 Nederlands
 English
Node-RED - Dashboard
We are now going to build a simple Dashboard in Node Red. With this you can build a simple control panel for your AI-Bot. By default in Node-Red, you can sometimes accidentally "destroy" the programs (flows) you built, for example by accidentally deleting a Node. If you build the control of your AI-Bot in a Dashboard, very little can go wrong.
We do need new types of Nodes for this. So we have to install those first.
Install Node Dashboard Module
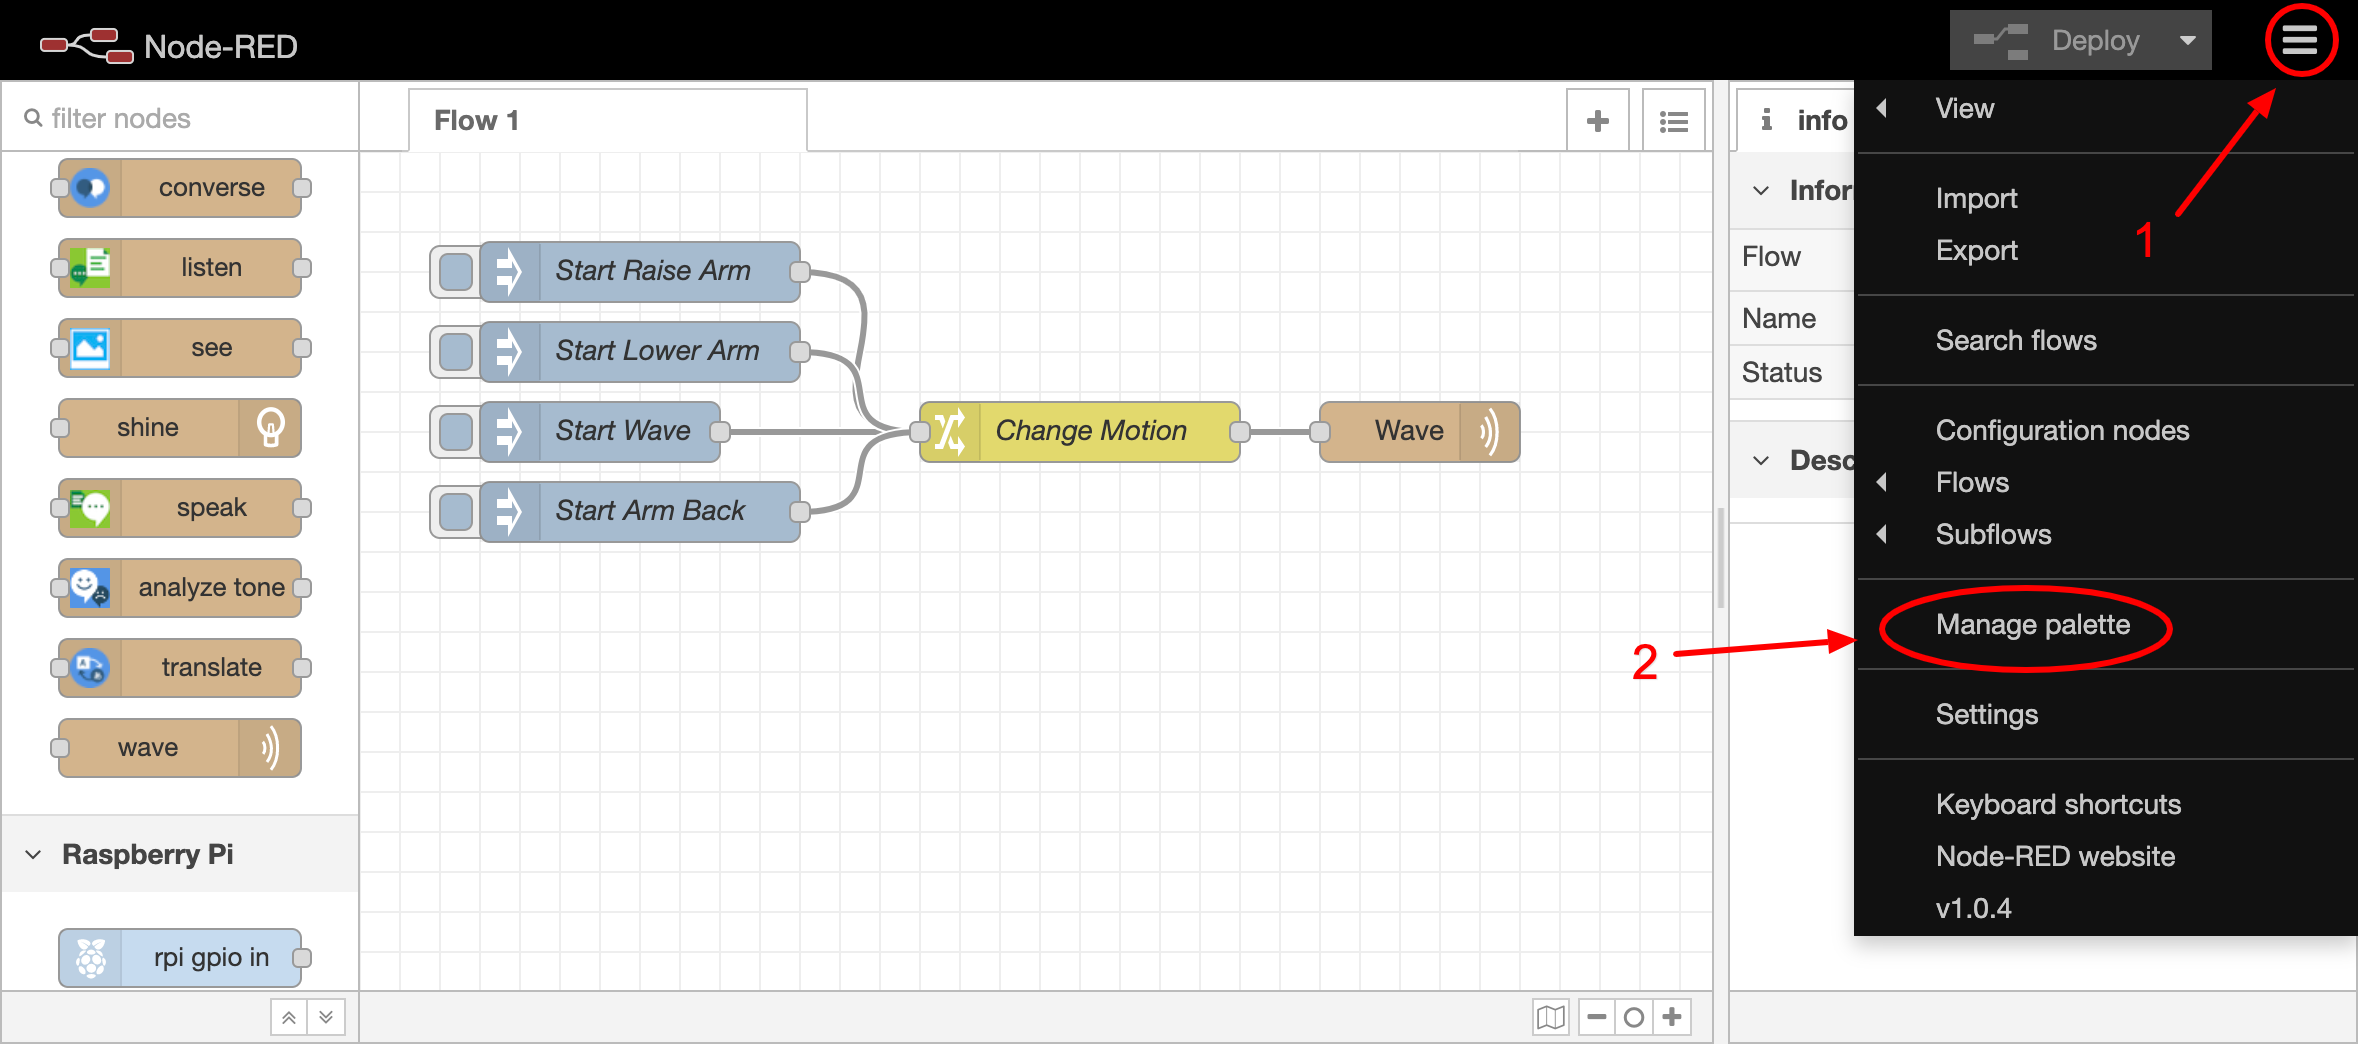
Click in your Node-Red environment on the 3 horizontal lines at the top right (see arrow 1 in the image below). Then select the option "Manage palette" (see arrow 2 in the image below).
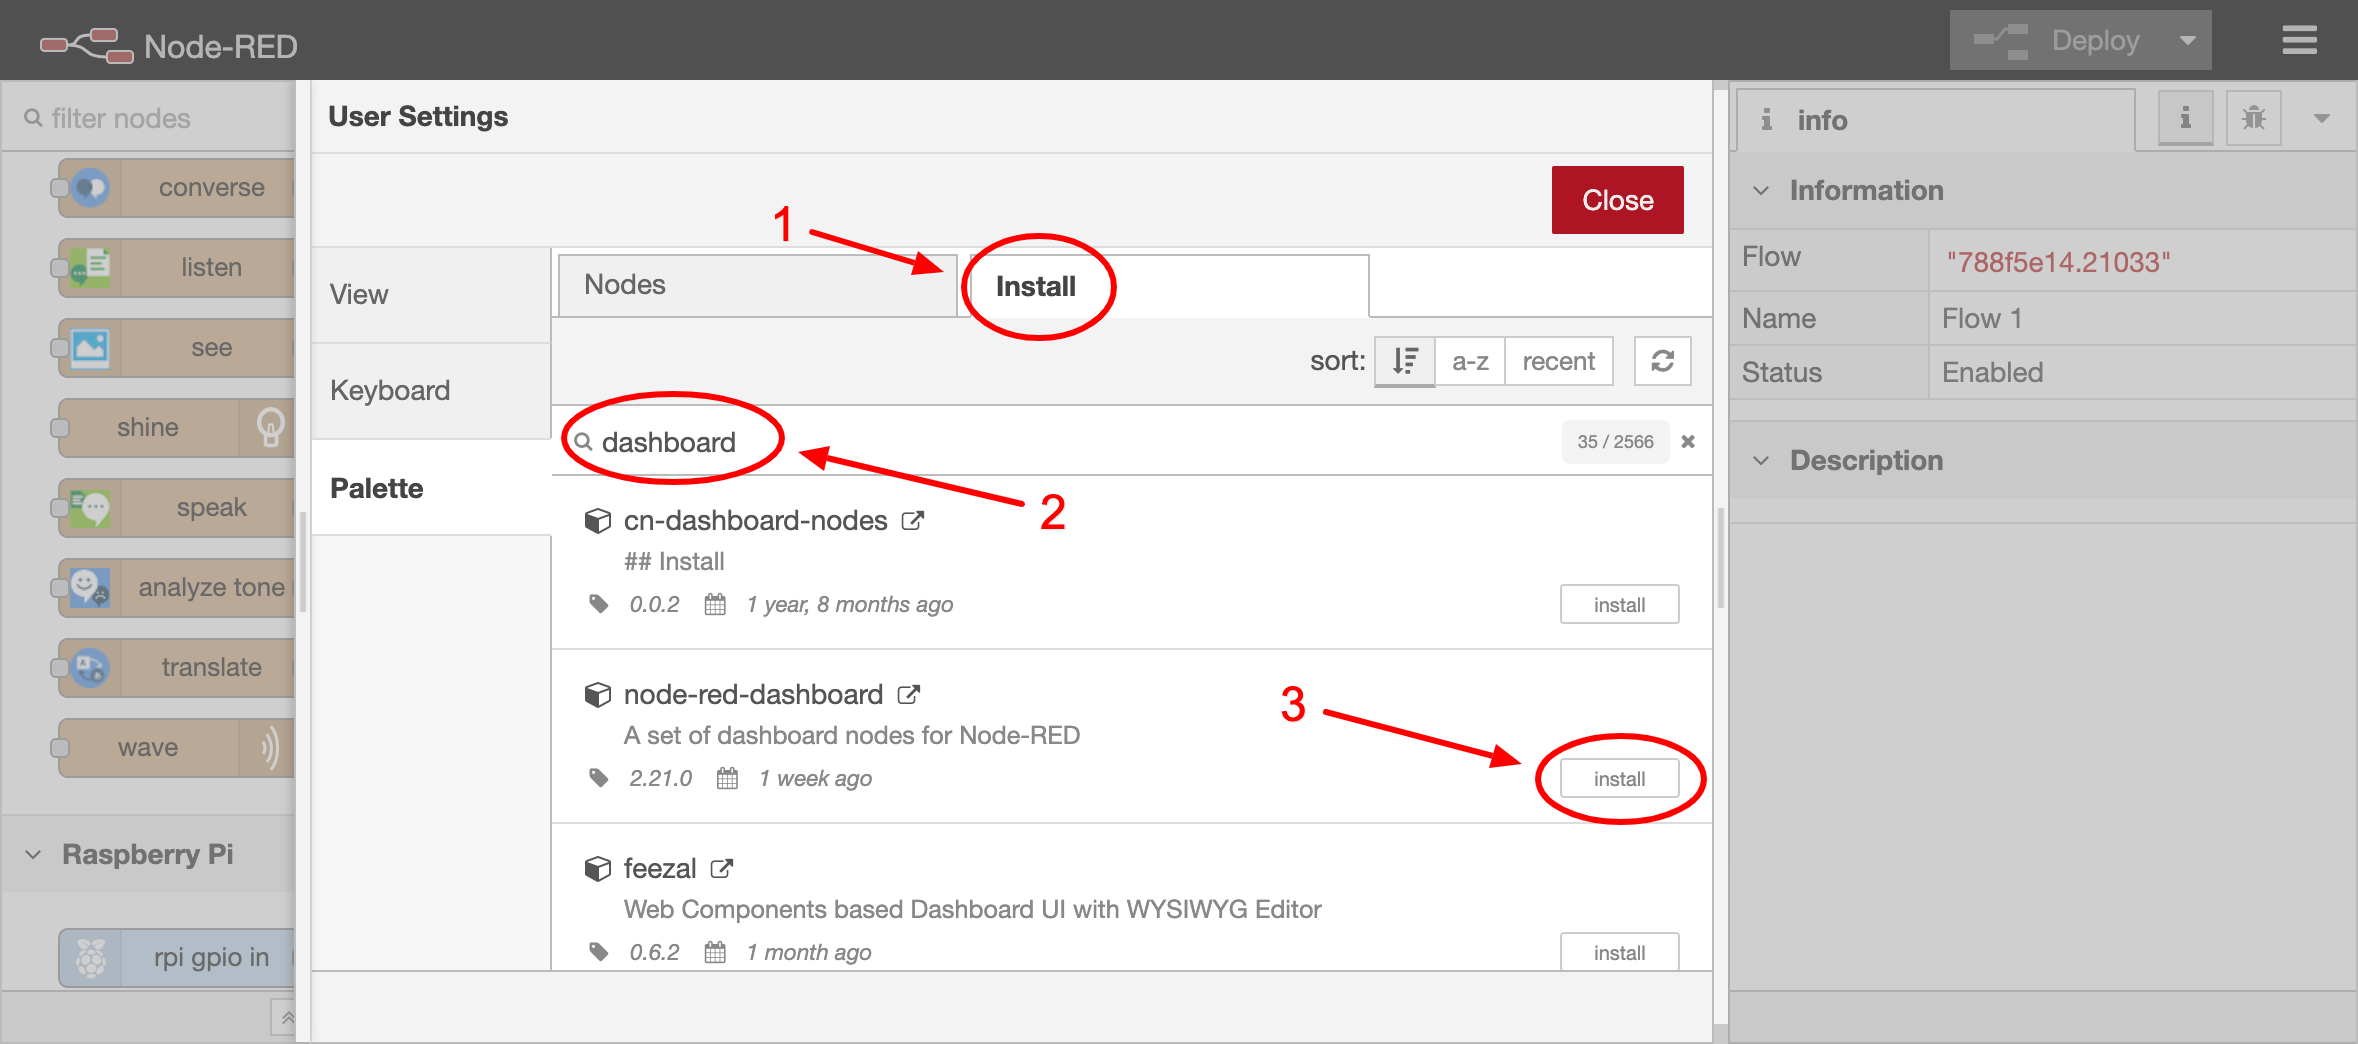
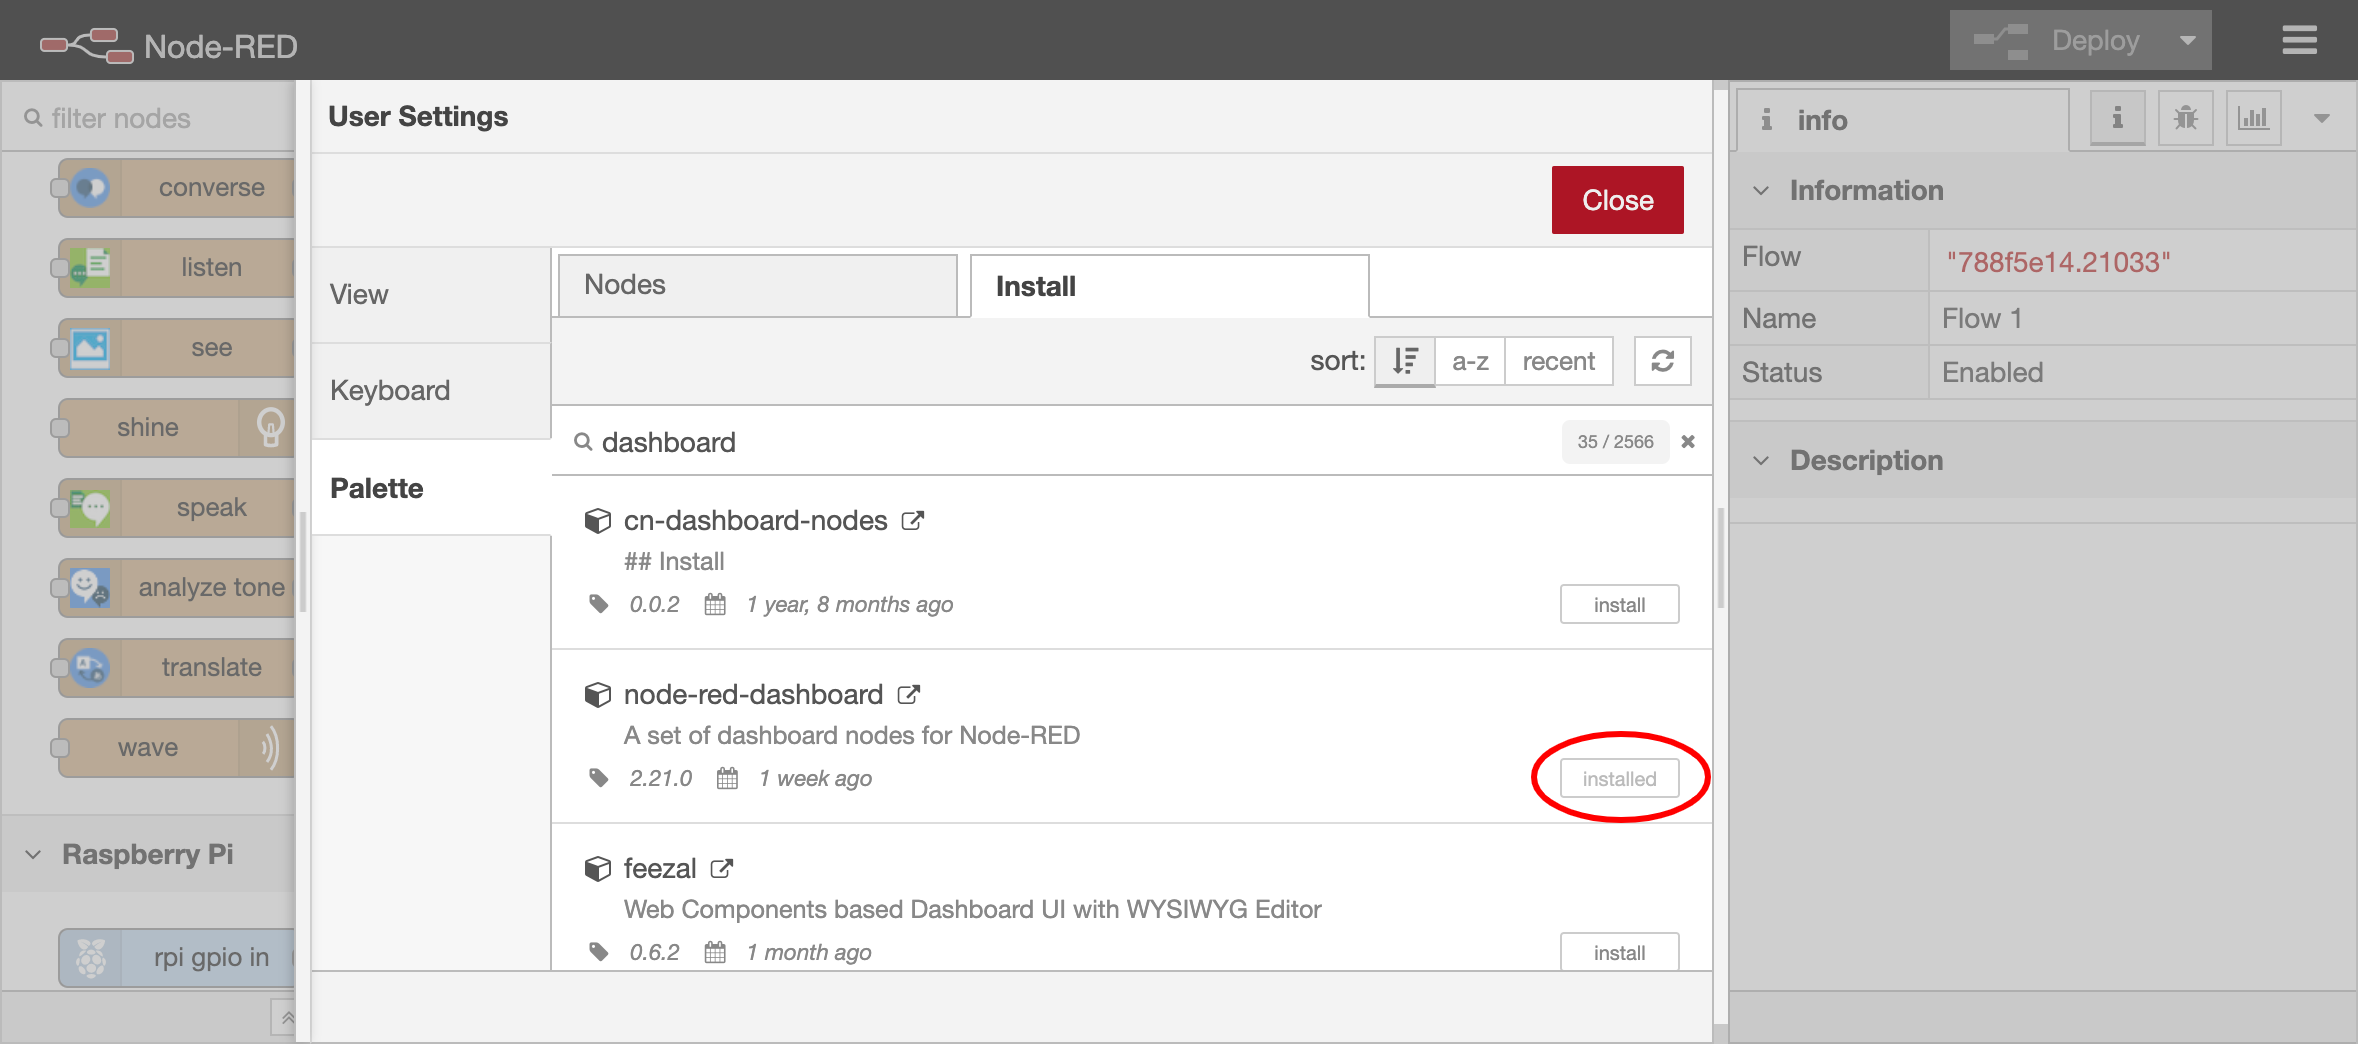
Now click on the "Install" tab (arrow 1), and then search for the word "dashboard" (arrow 2).
Click on the button "install" (arrow 3) behind "node-red-dashboard".
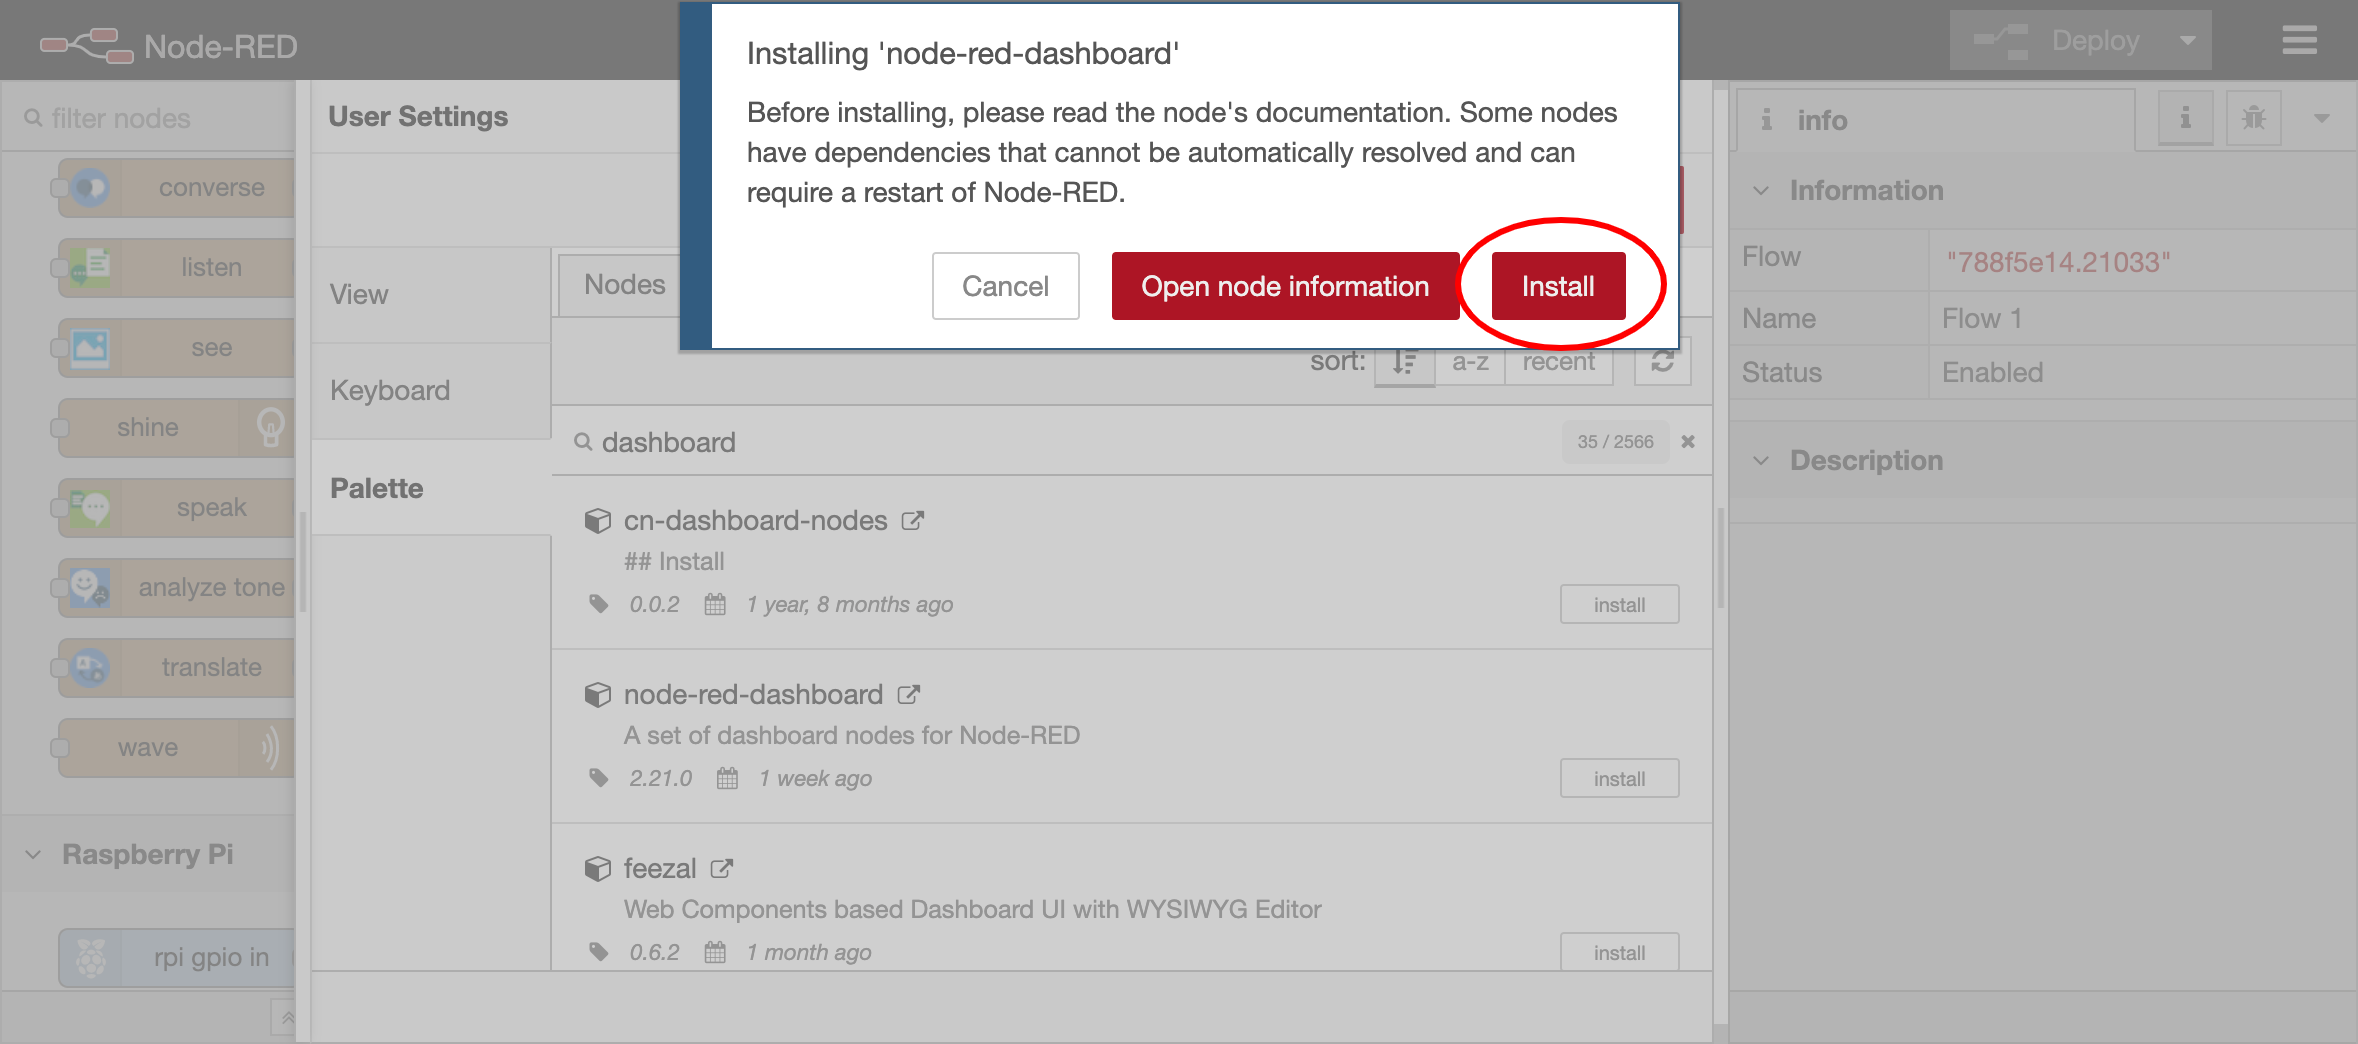
Now click the "Install" button again when you need to confirm the installation.
Now you have to wait for the installation to finish, this takes about 10 - 20 seconds.
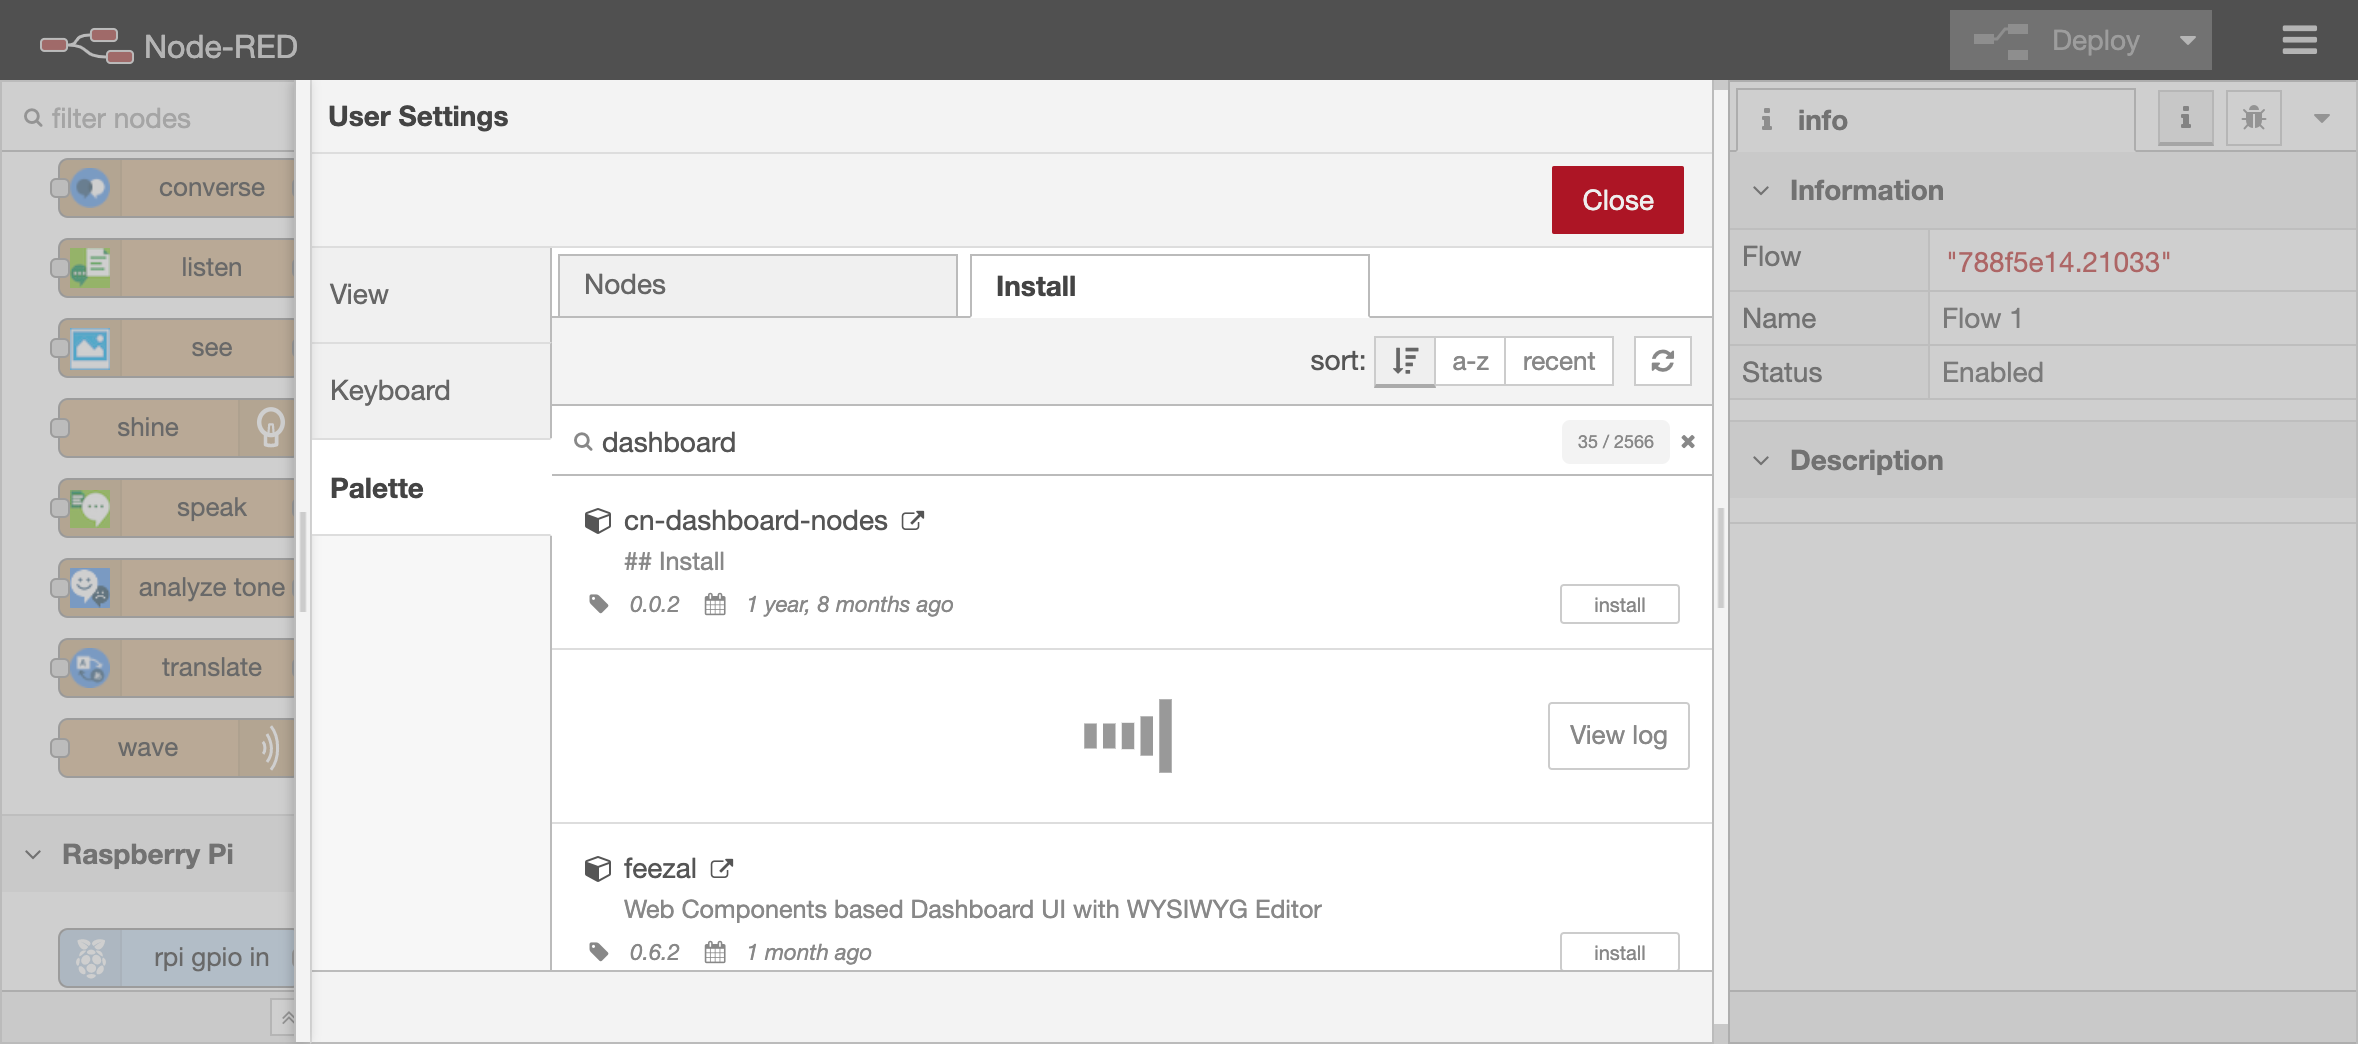
When the installation is finished, it mentions "Installed" behind the node module you just installed.
Build a Colour Picker
In the Basics lesson you learned how to make the LED light change color. But if you want a different color you have to select it in the Shine Node or forward the color you want in a message.
With a color picker (color picker) on a dashboard, you can change the color of the LED light much more easily.
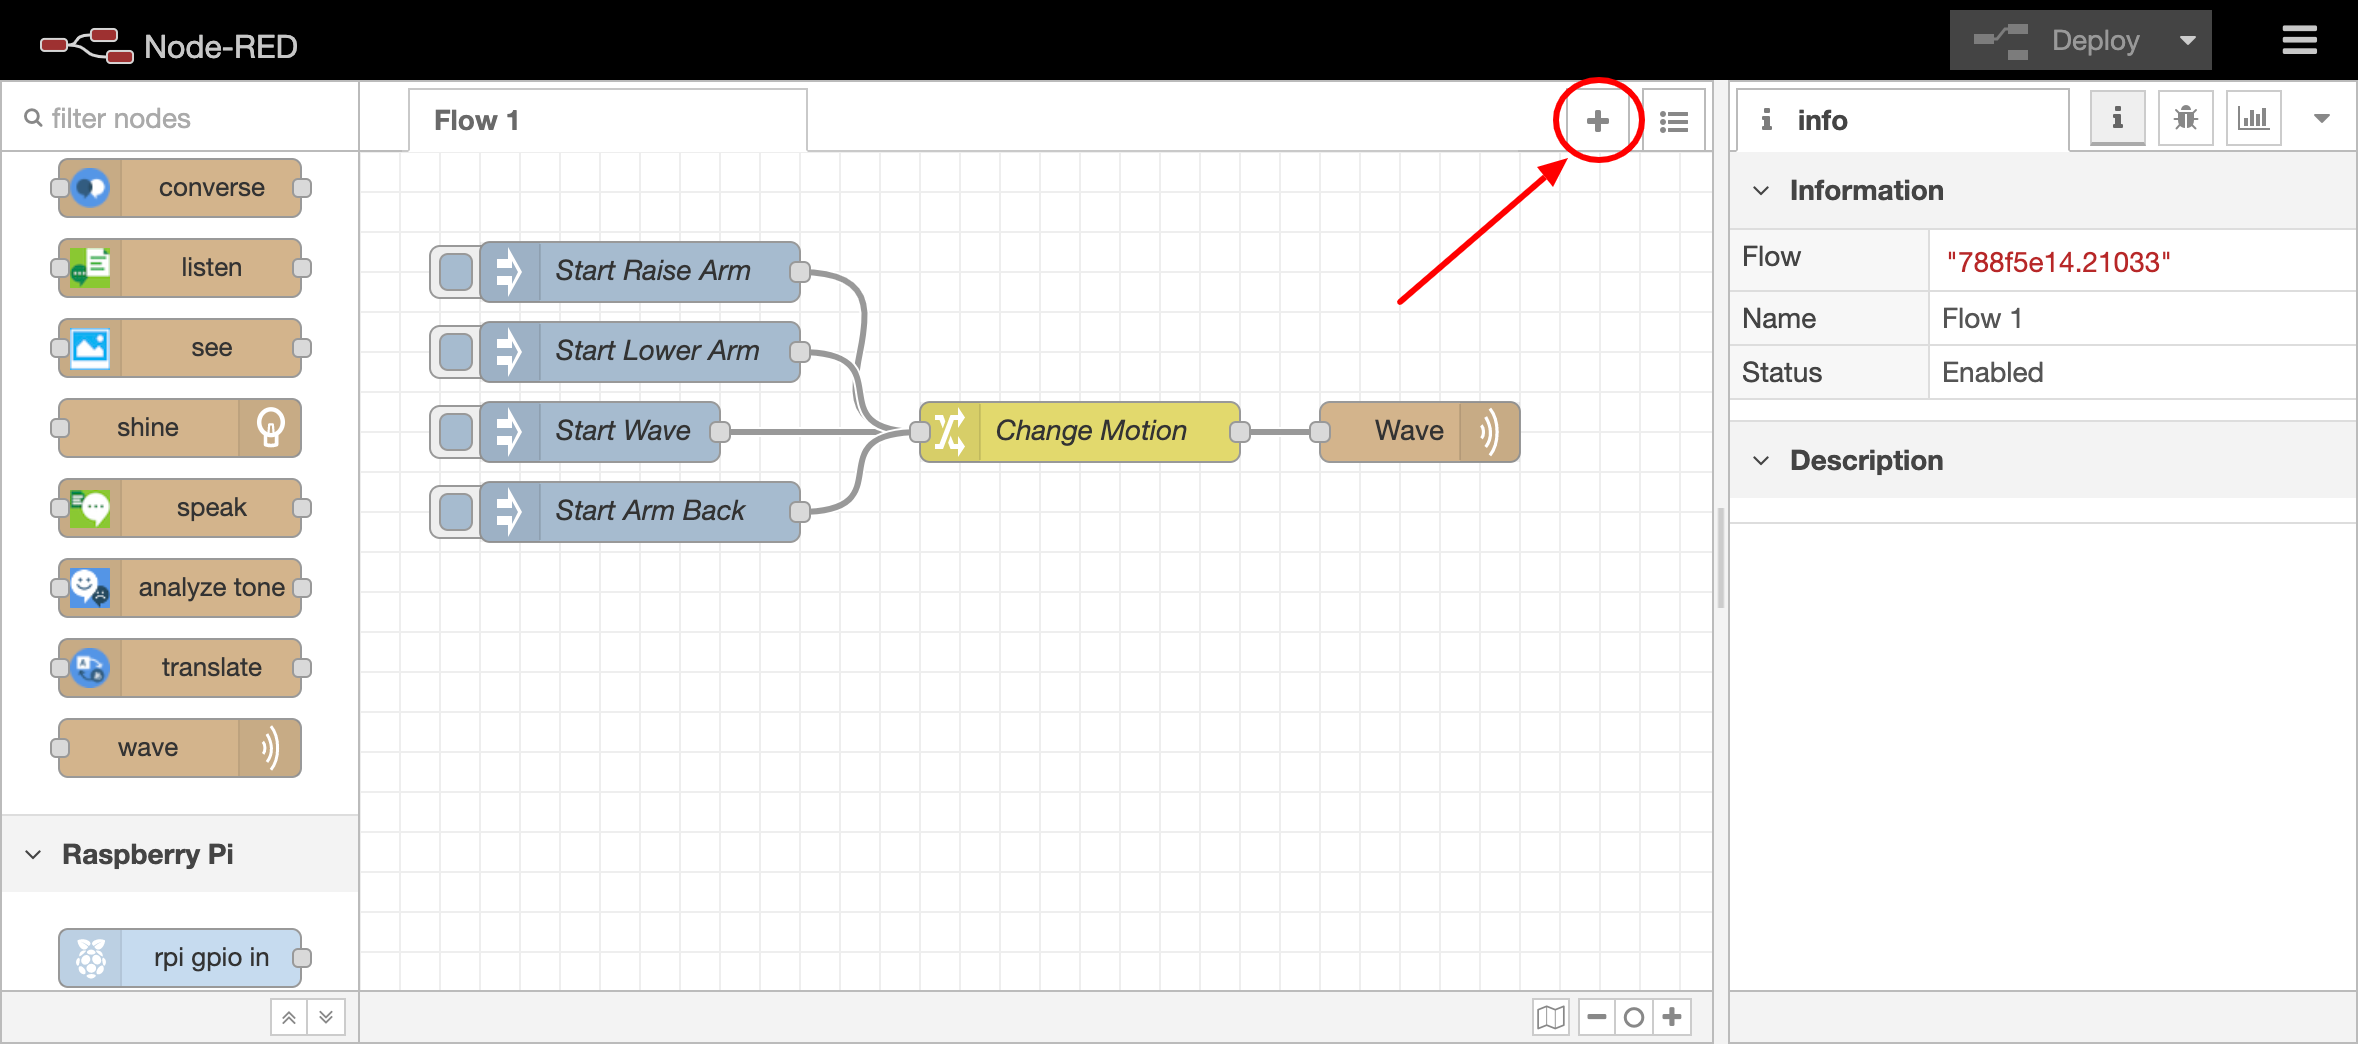
Let's first create a new worksheet for the Dashboard Flows. You do this by clicking on the plus sign at the top right of the worksheet.
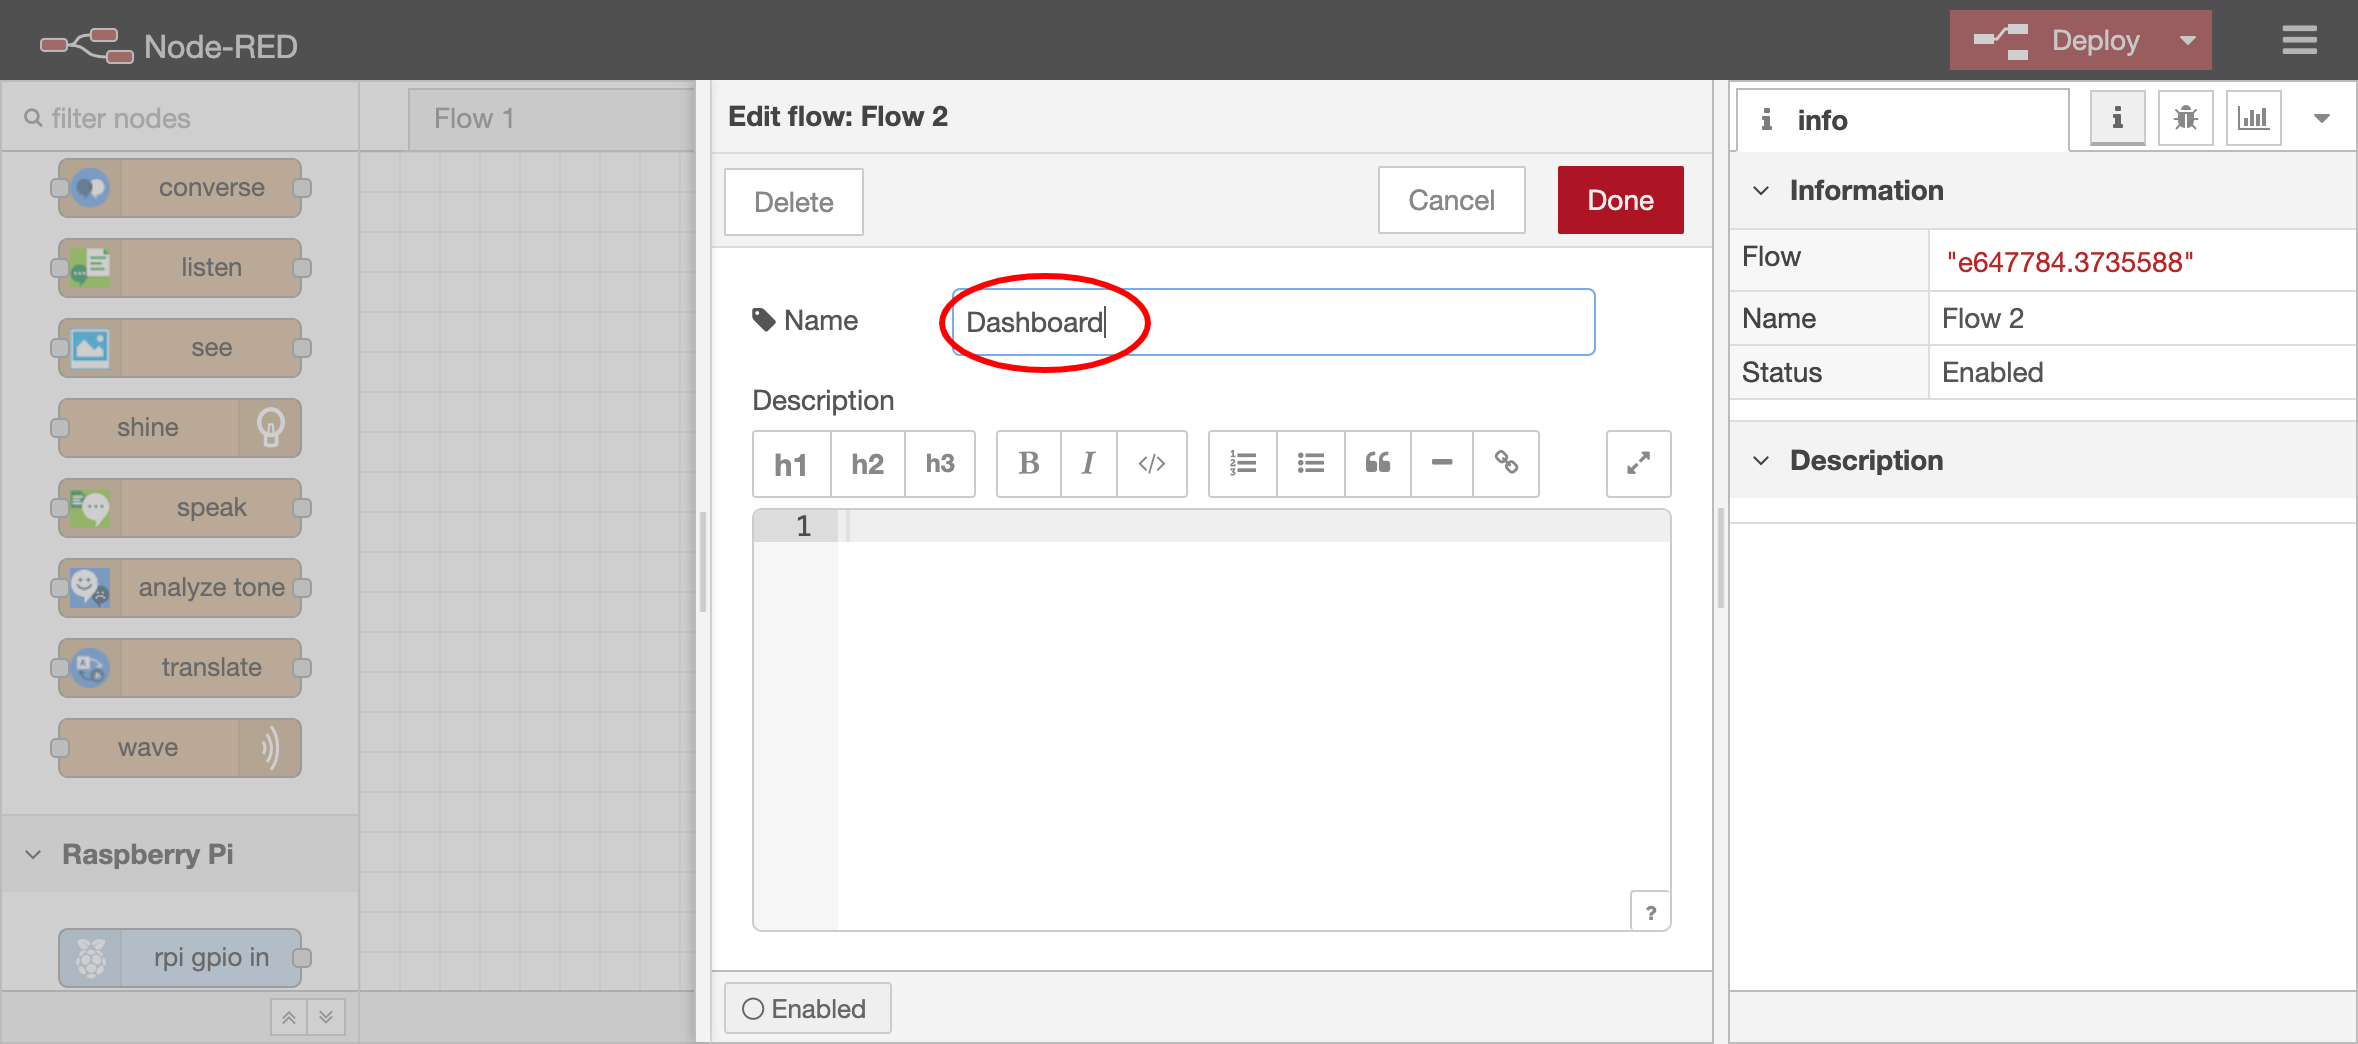
Name this new worksheet "Dashboard" and click "Done".
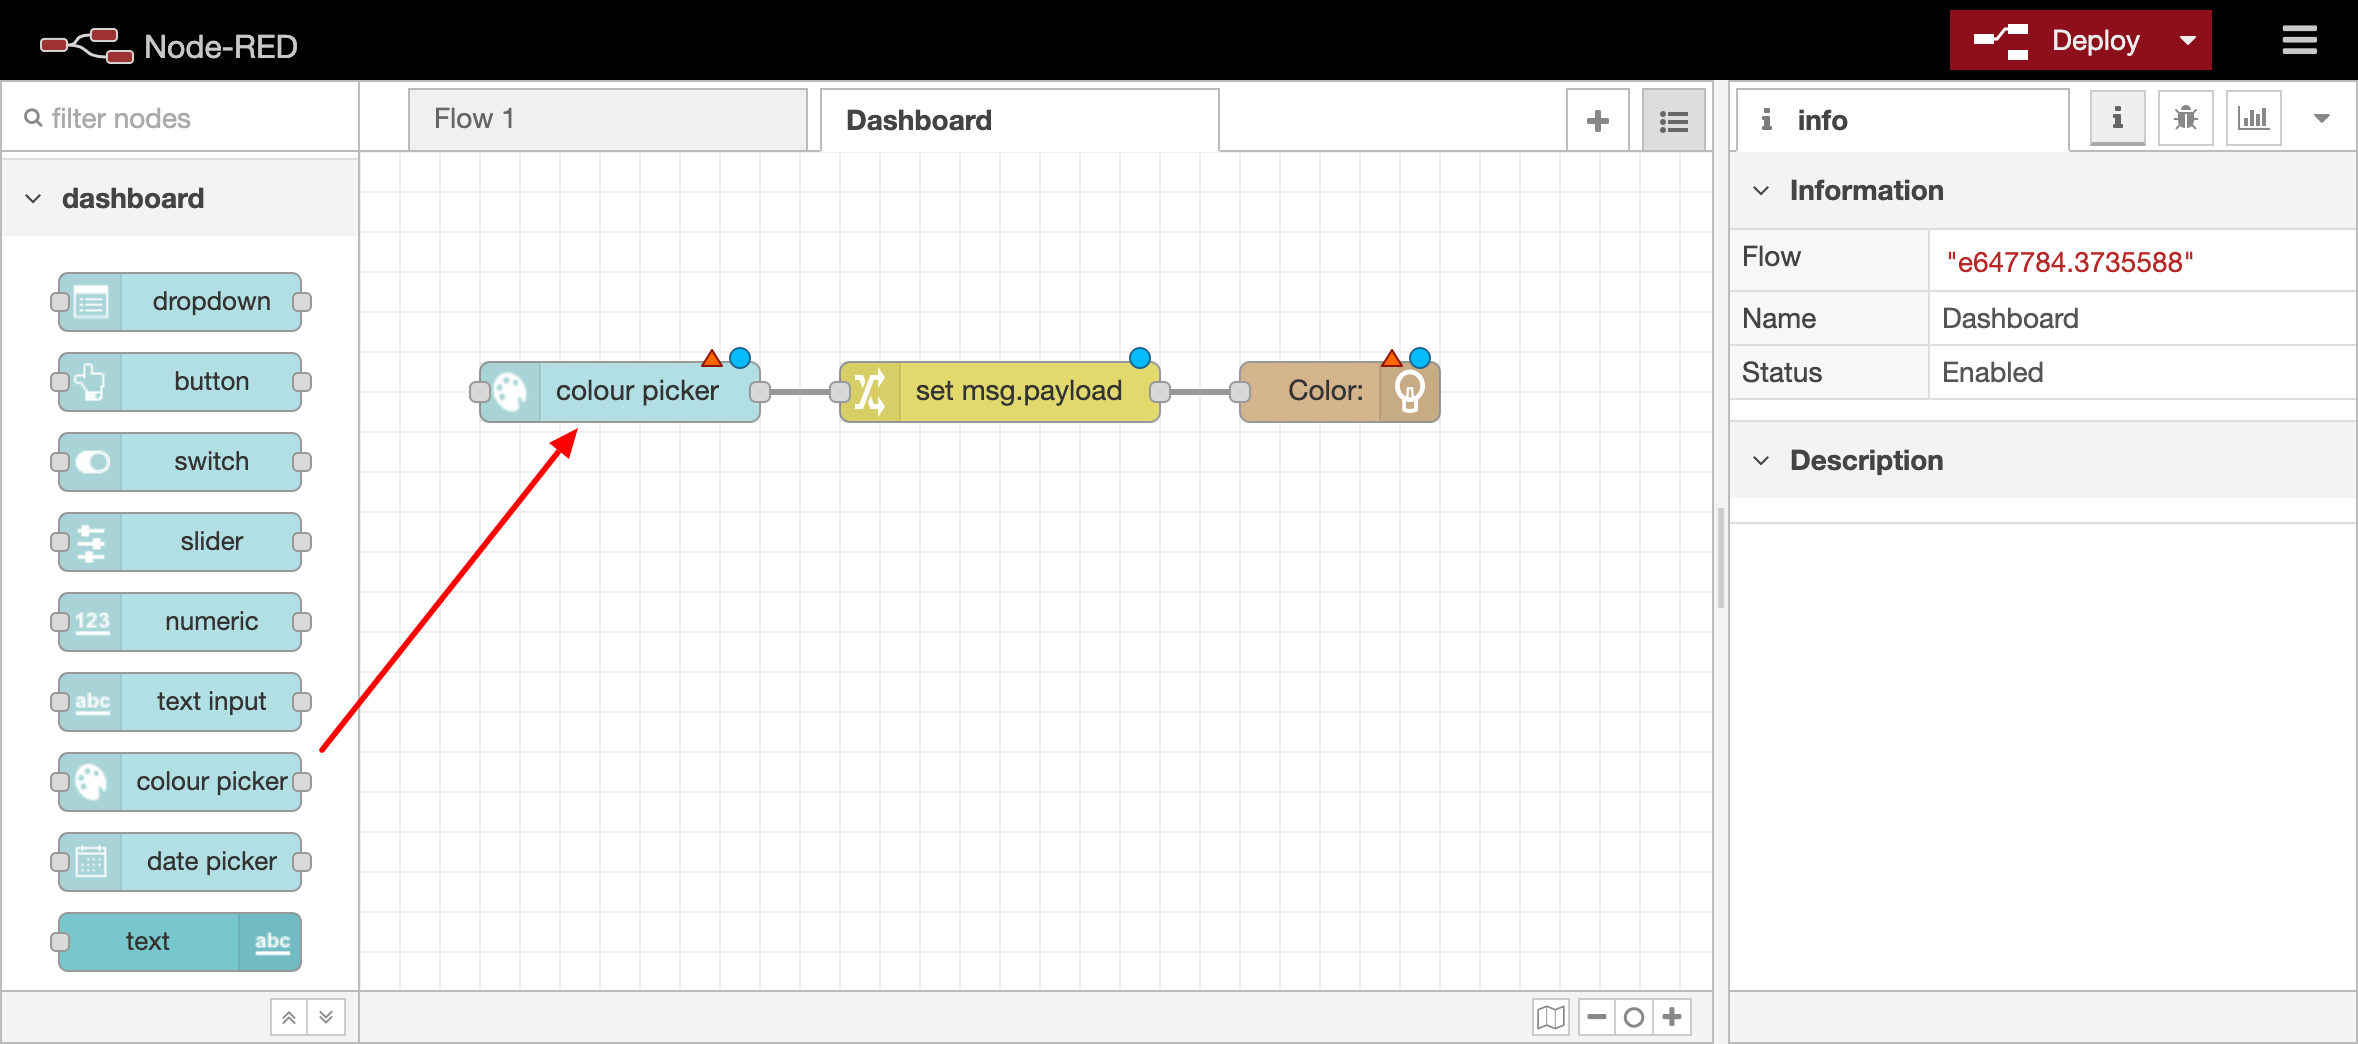
Now drag the node "colour picker" under the heading "dashboard" to the worksheet. Also drag a "change" and "shine" node to the worksheet and connect them as shown in the image below.
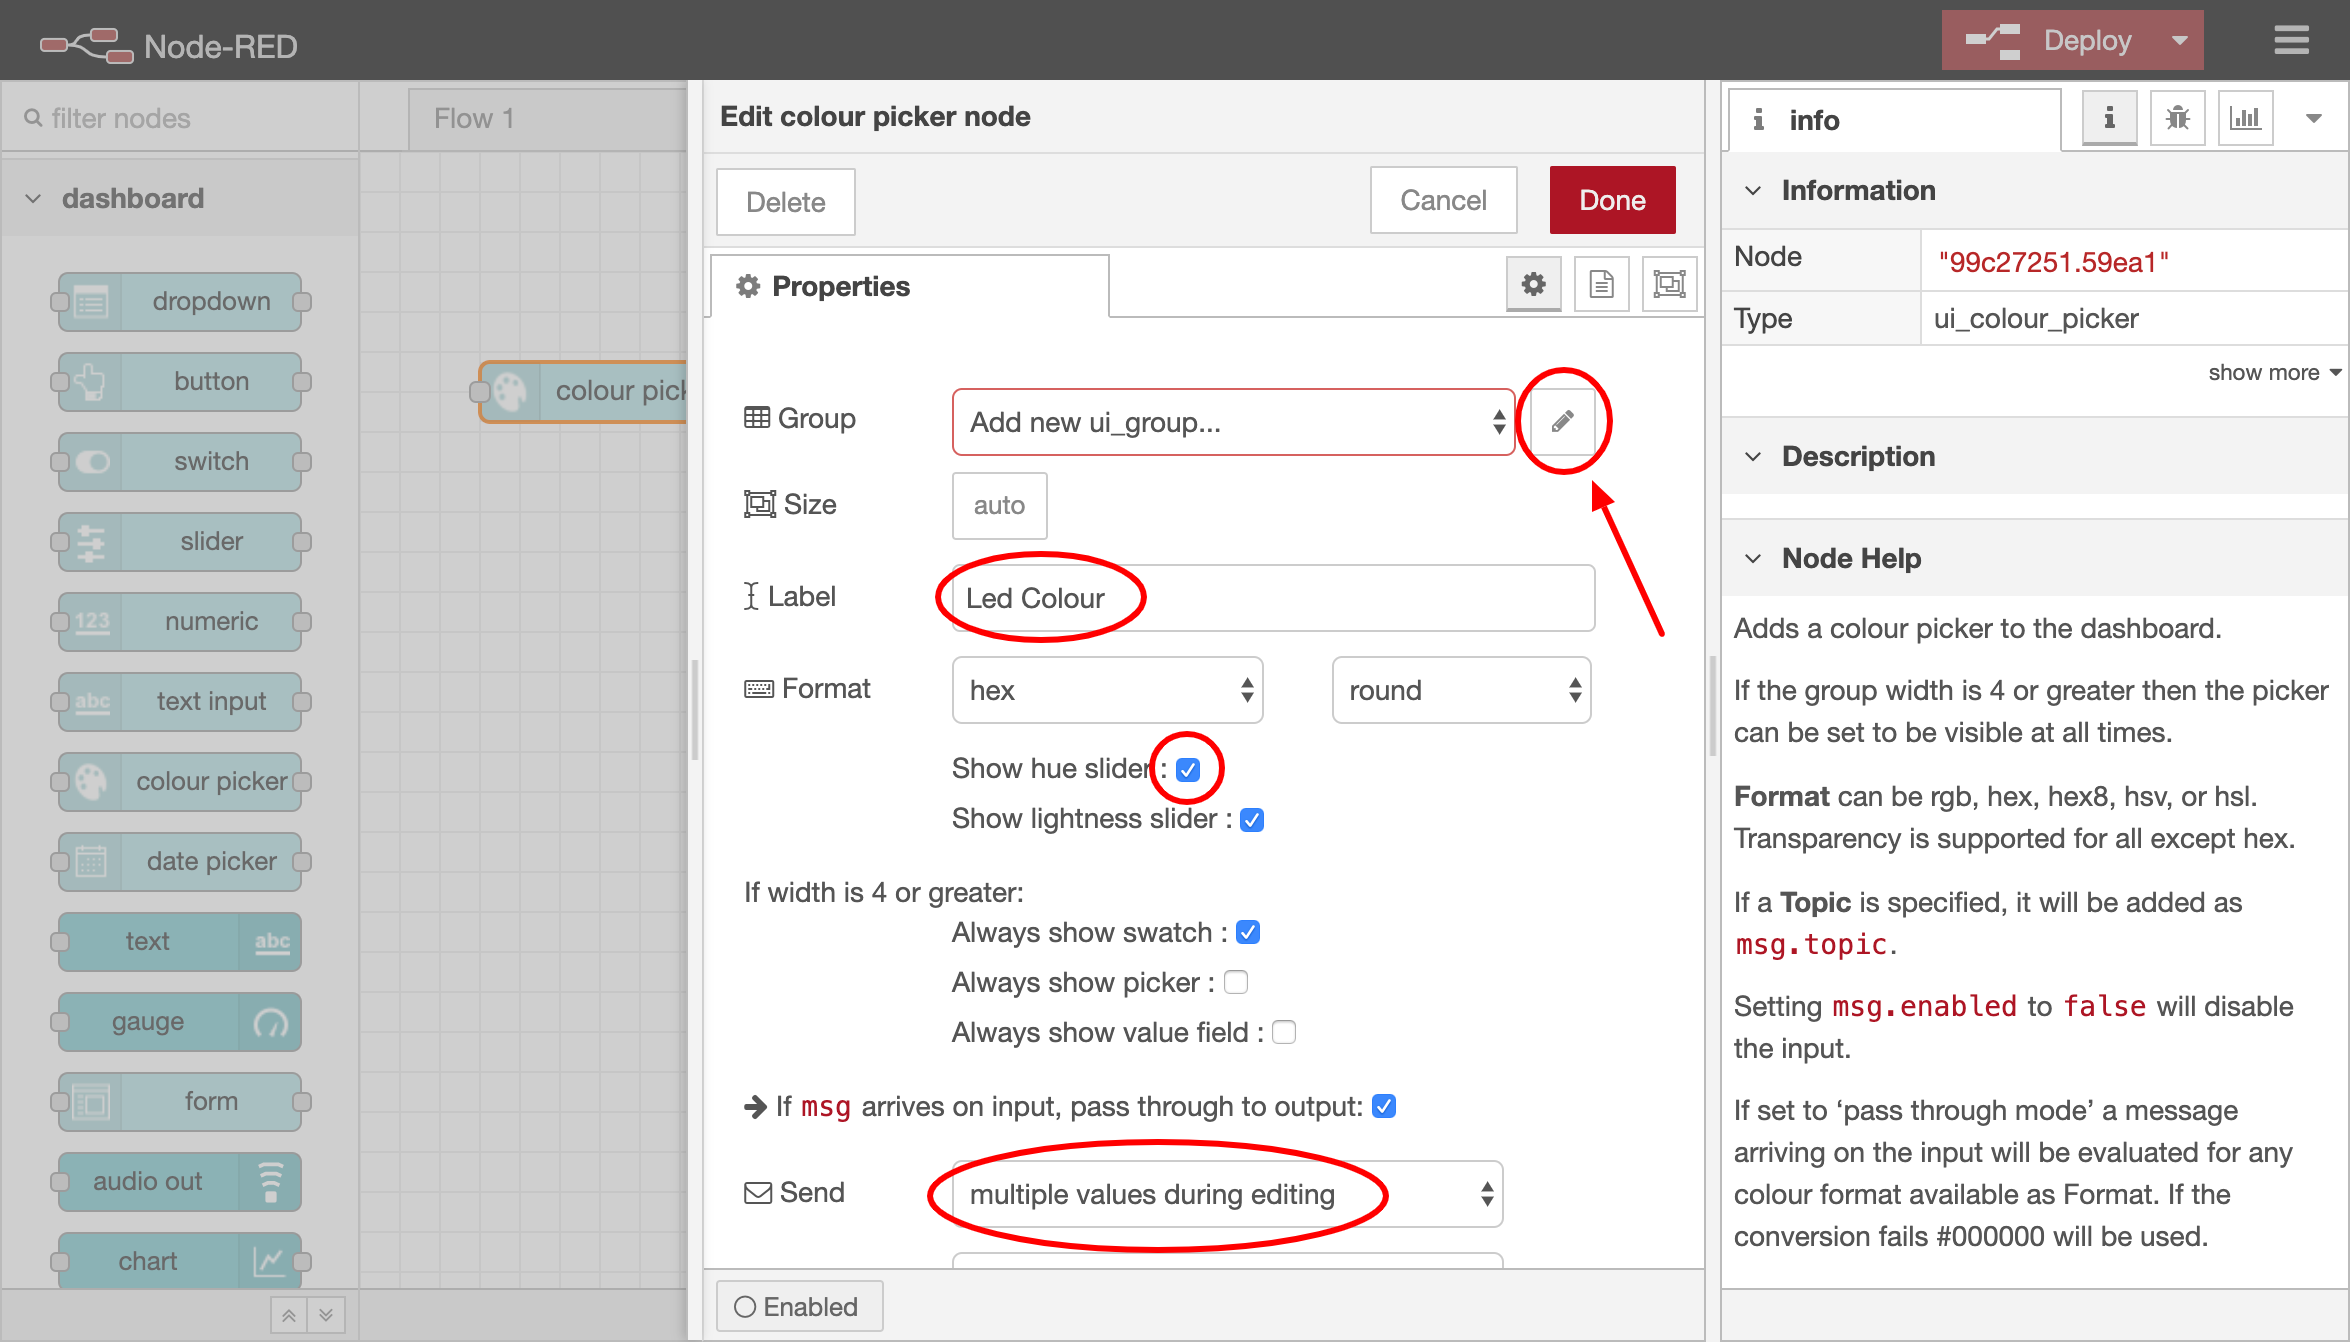
Double click on the "colour picker" node and name it "Led Color". Select the options "Show hue slider" and "multiple values during editing" at the option "Send". Then click on the pencil icon at the "Group" option so we can create a new Dashboard Group.
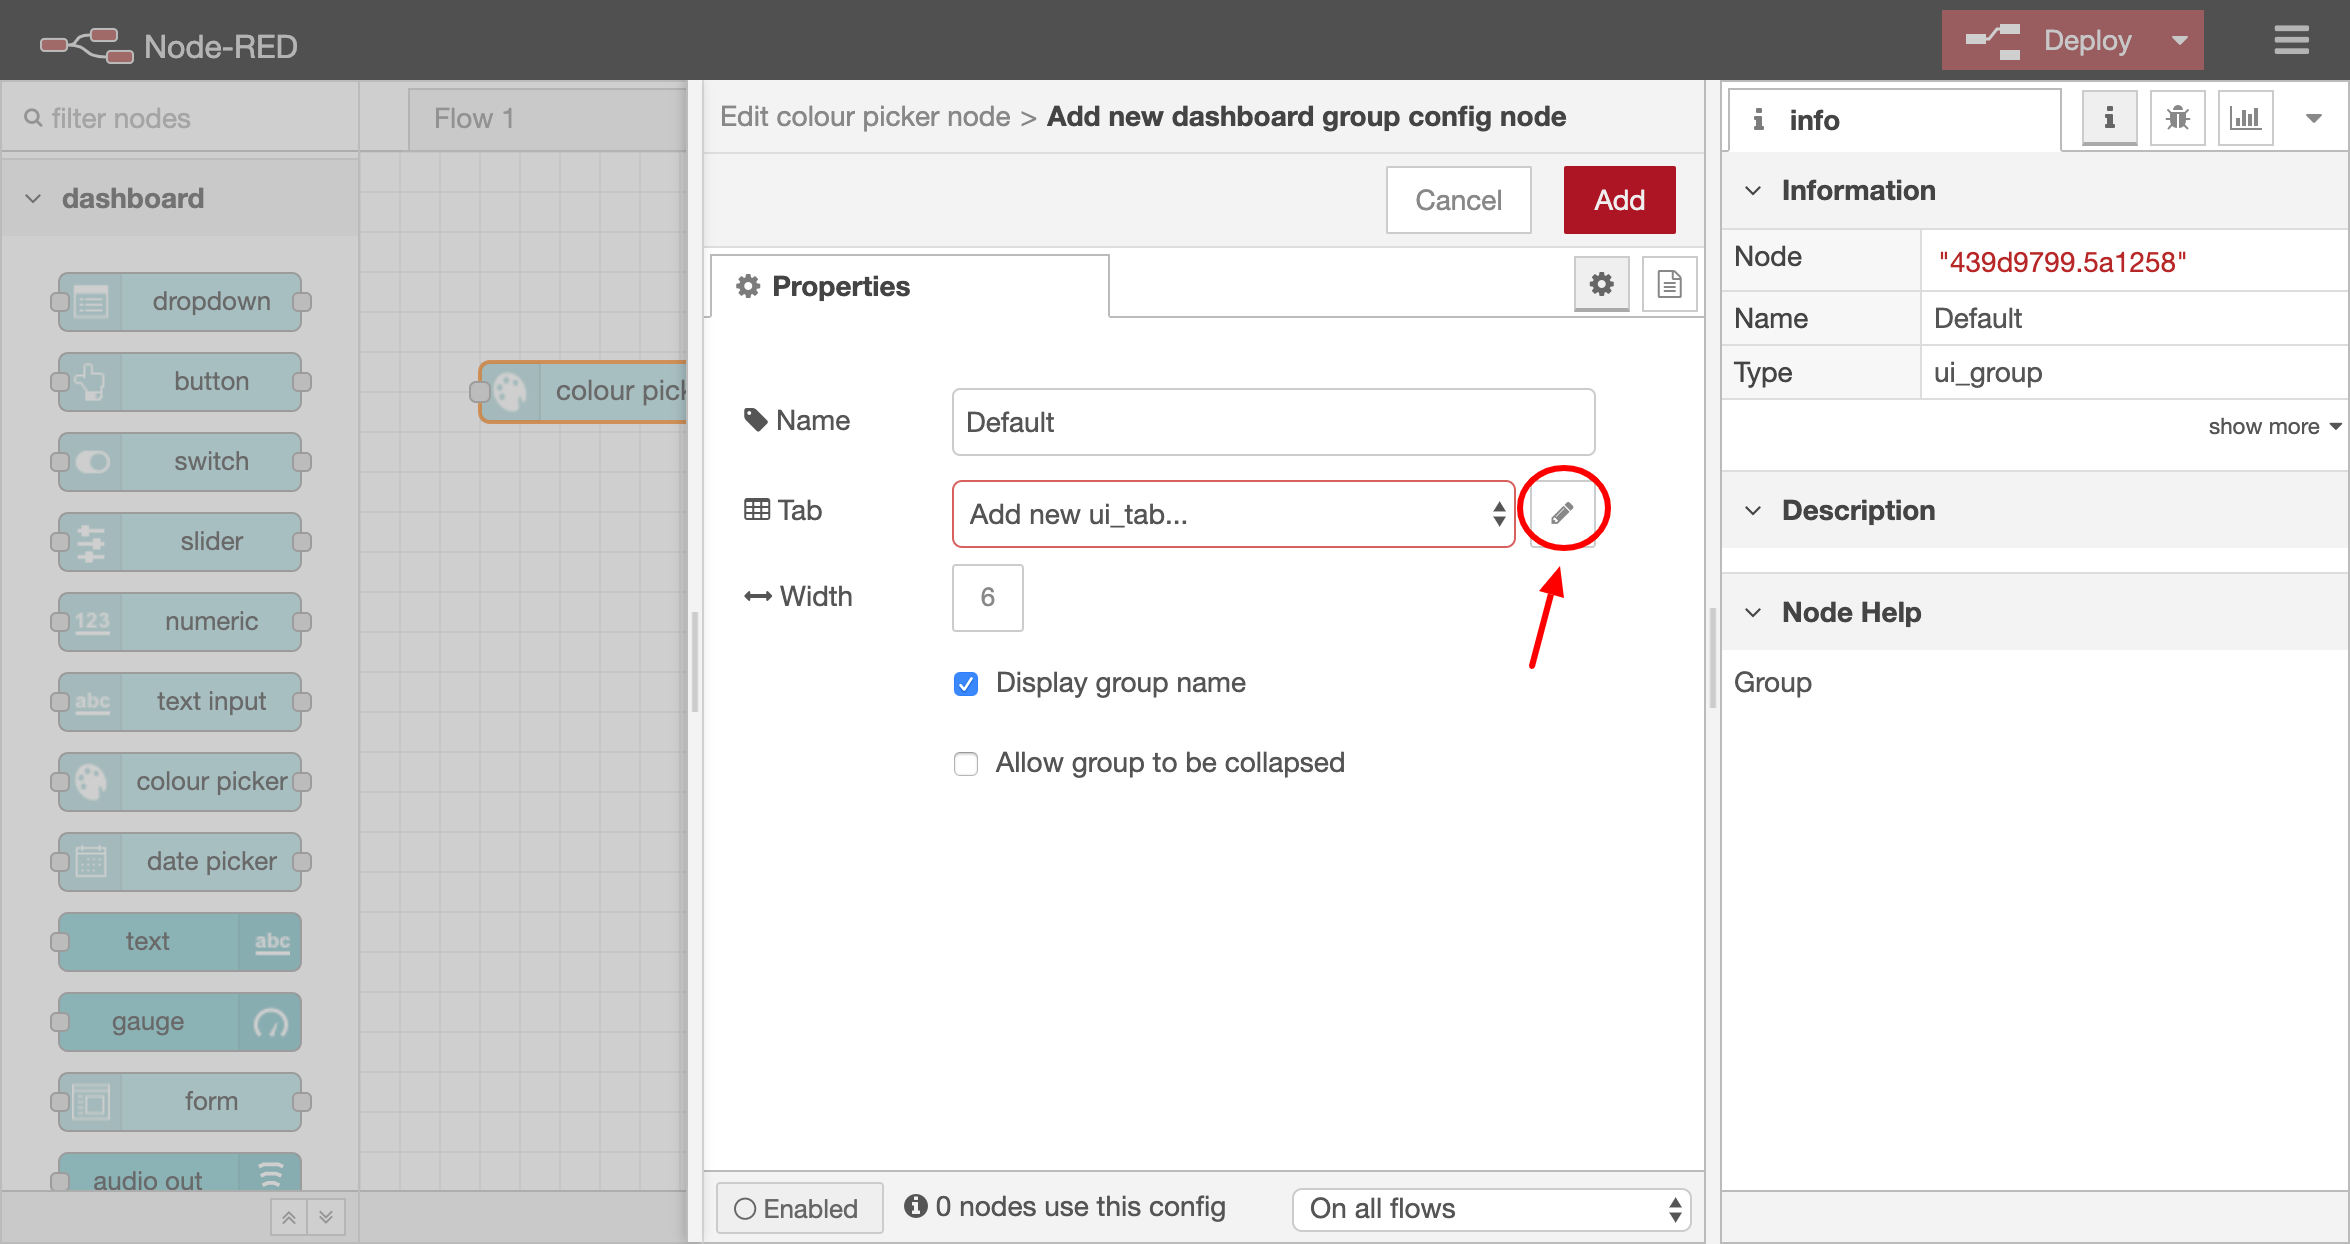
As you can see, the new dashboard group is already named "Default" by default. We now have to create a tab for this group. You can do this by clicking on the pencil icon behind the "Tab" option.
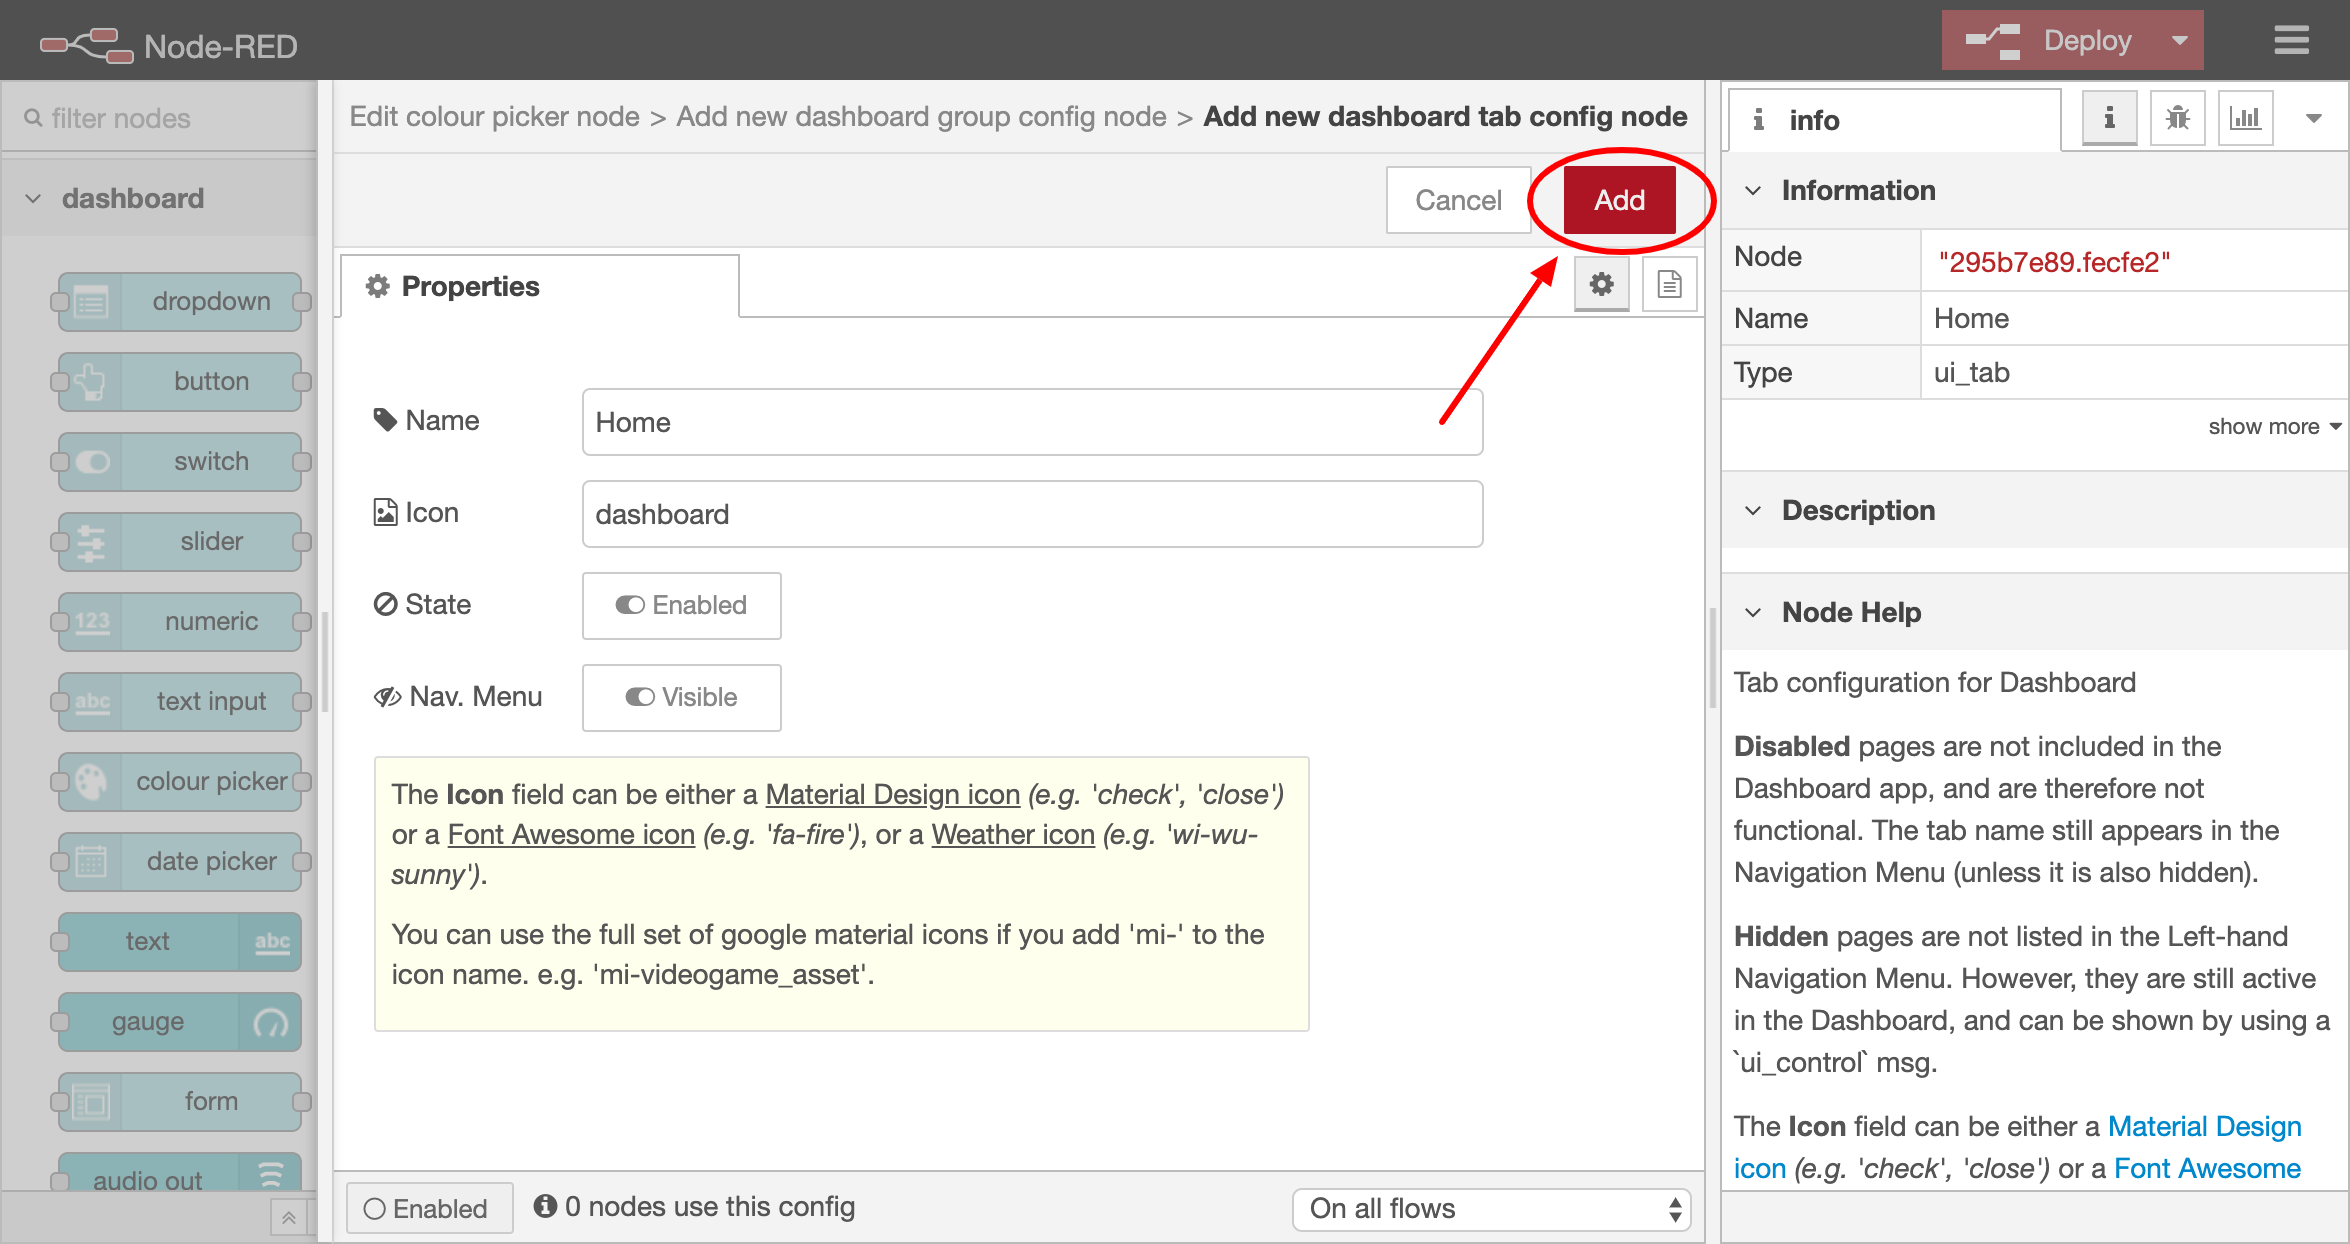
The new tab has already been given a name: "Home". You don't have to do anything here.
Now click on the "Add" and / or "Done" buttons until you see the "Dashboard" worksheet again.
Now double click on the Shine node. Select the Mode 'Shine' and Color '- set msg.color -'.
Click on "Done".

Double-click the Change Node. Name it "Change Color" and add "msg.color" to "Set" and "to" 'msg.payload'. Now click on "Done".
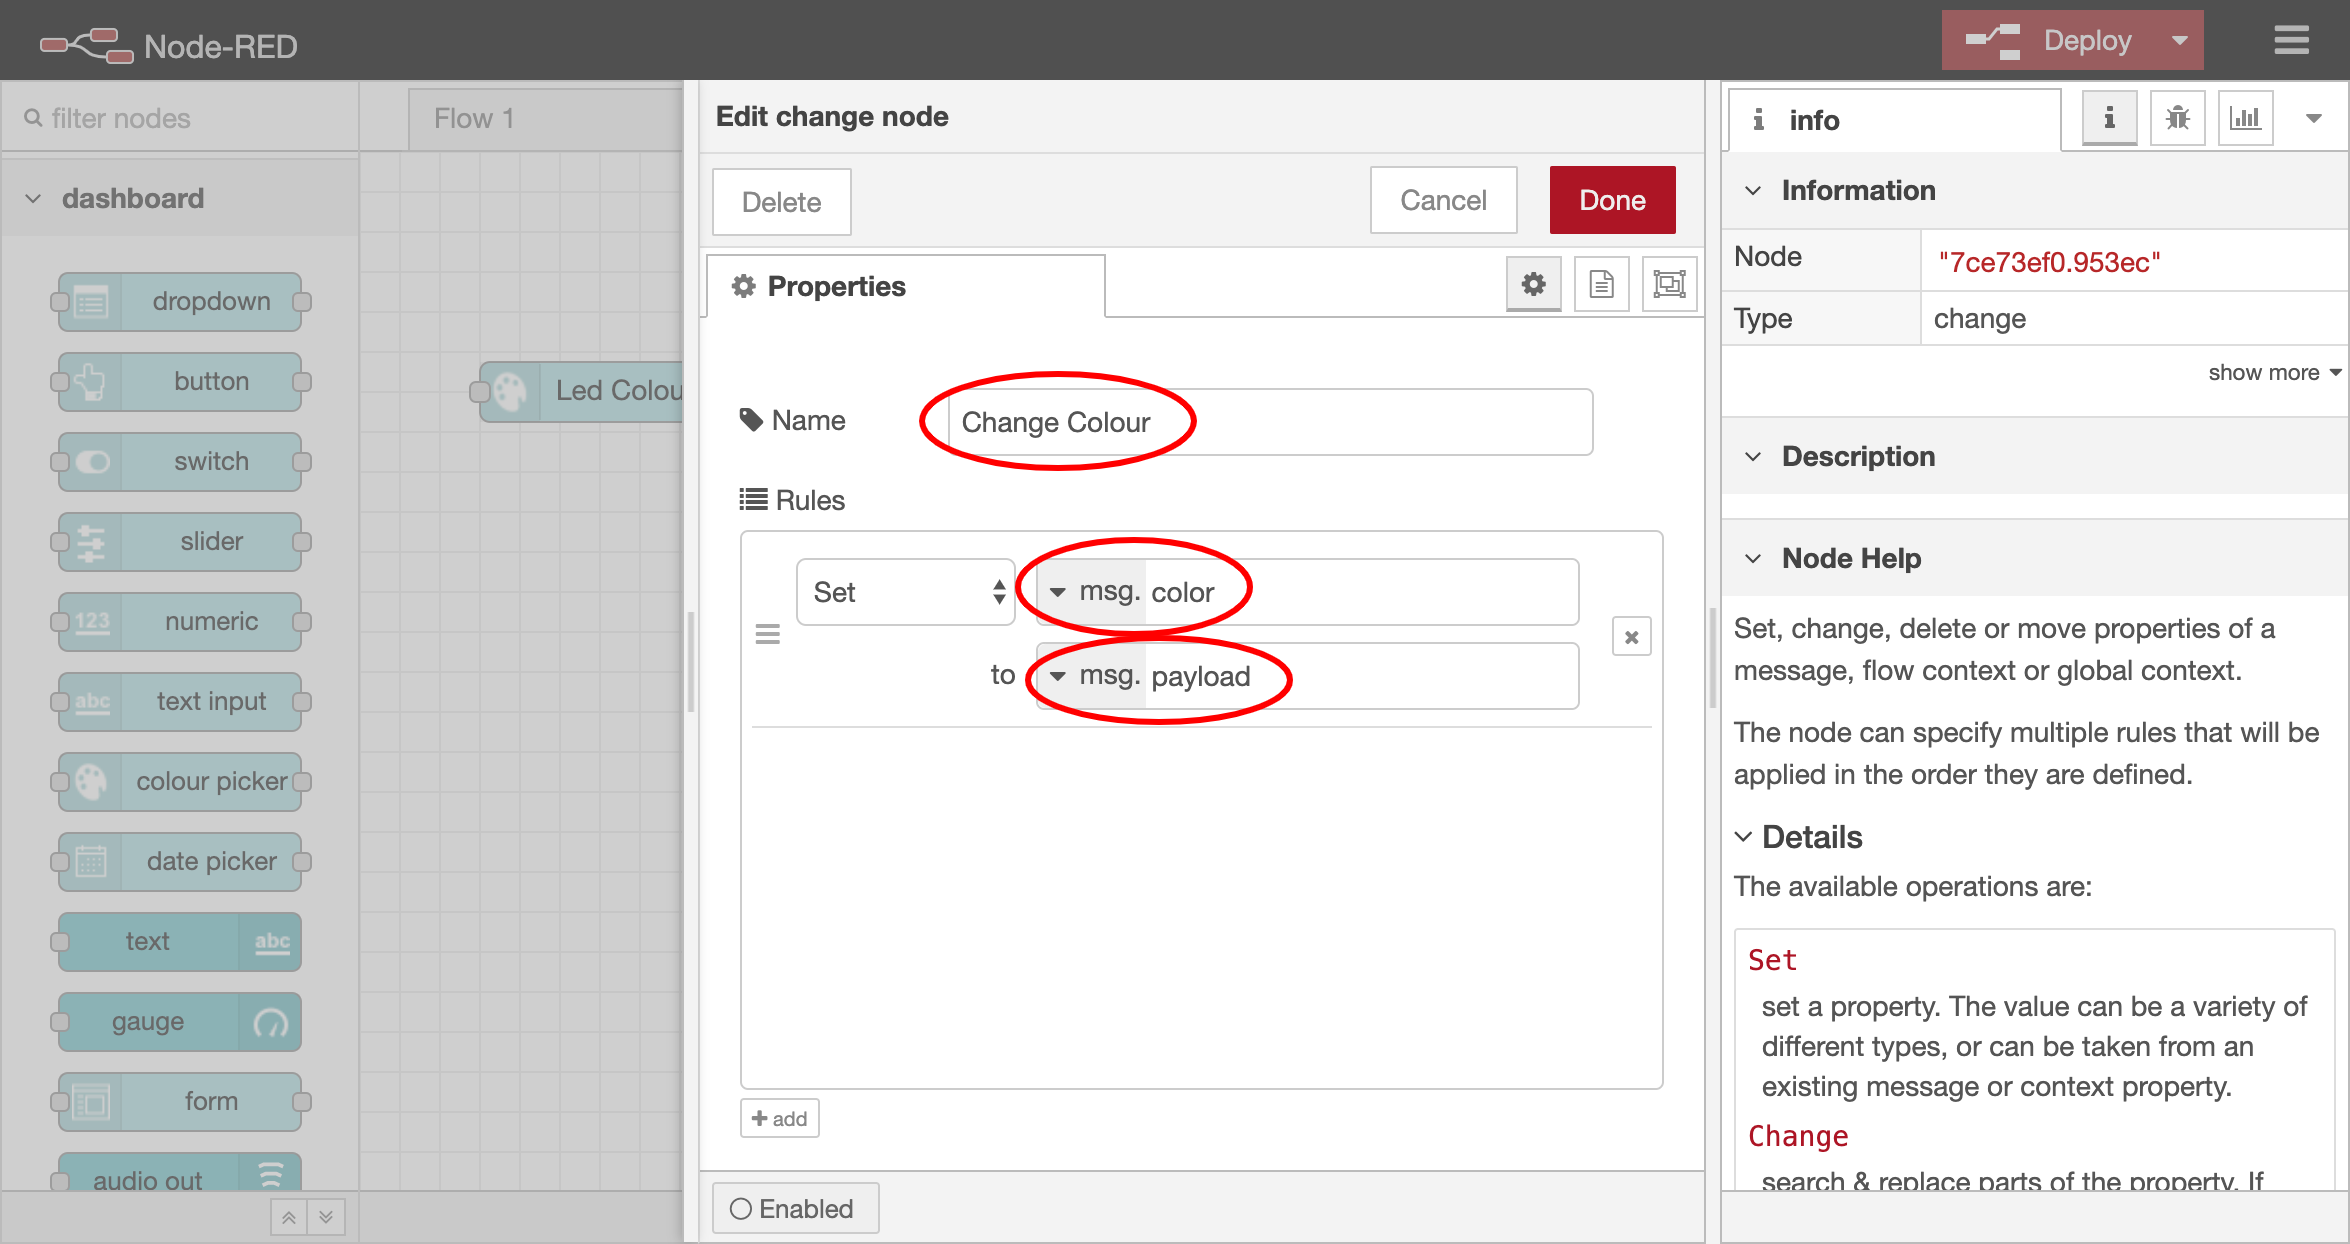
You have now built a Flow that sends the value of a color picker to a change node. The value from the color picker (msg.payload) is then sent to the Shine node in a message (msg.color).
Now click Deploy. We are now going to open the Dashboard to see what the result looks like.
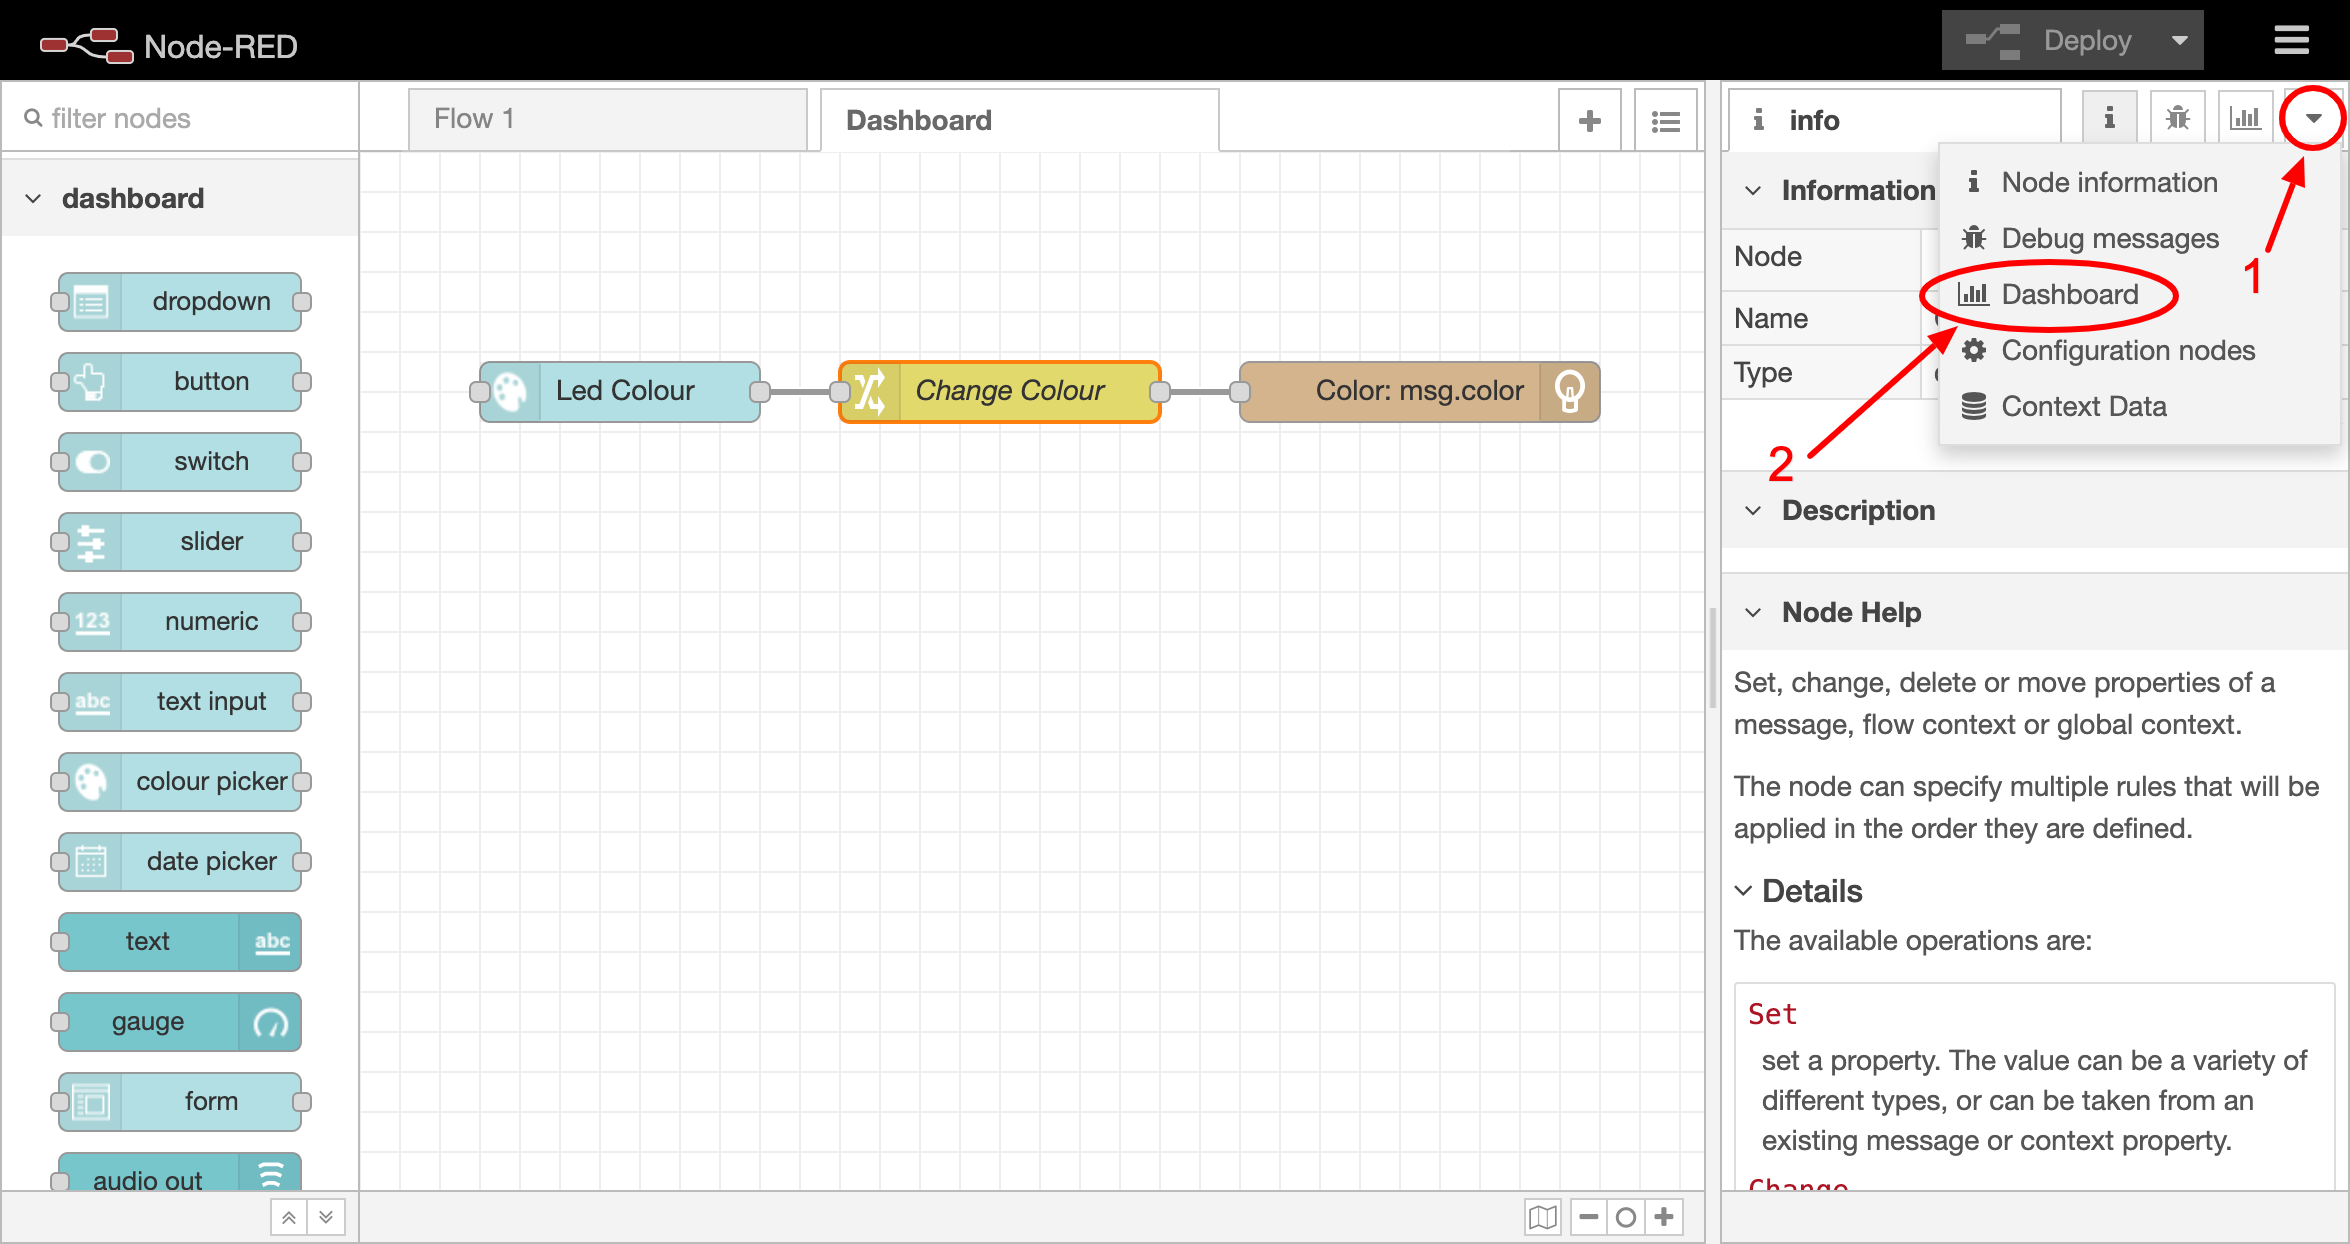
Click on the triangle pointing down (arrow 1) and then on the option "Dashboard" (arrow 2).
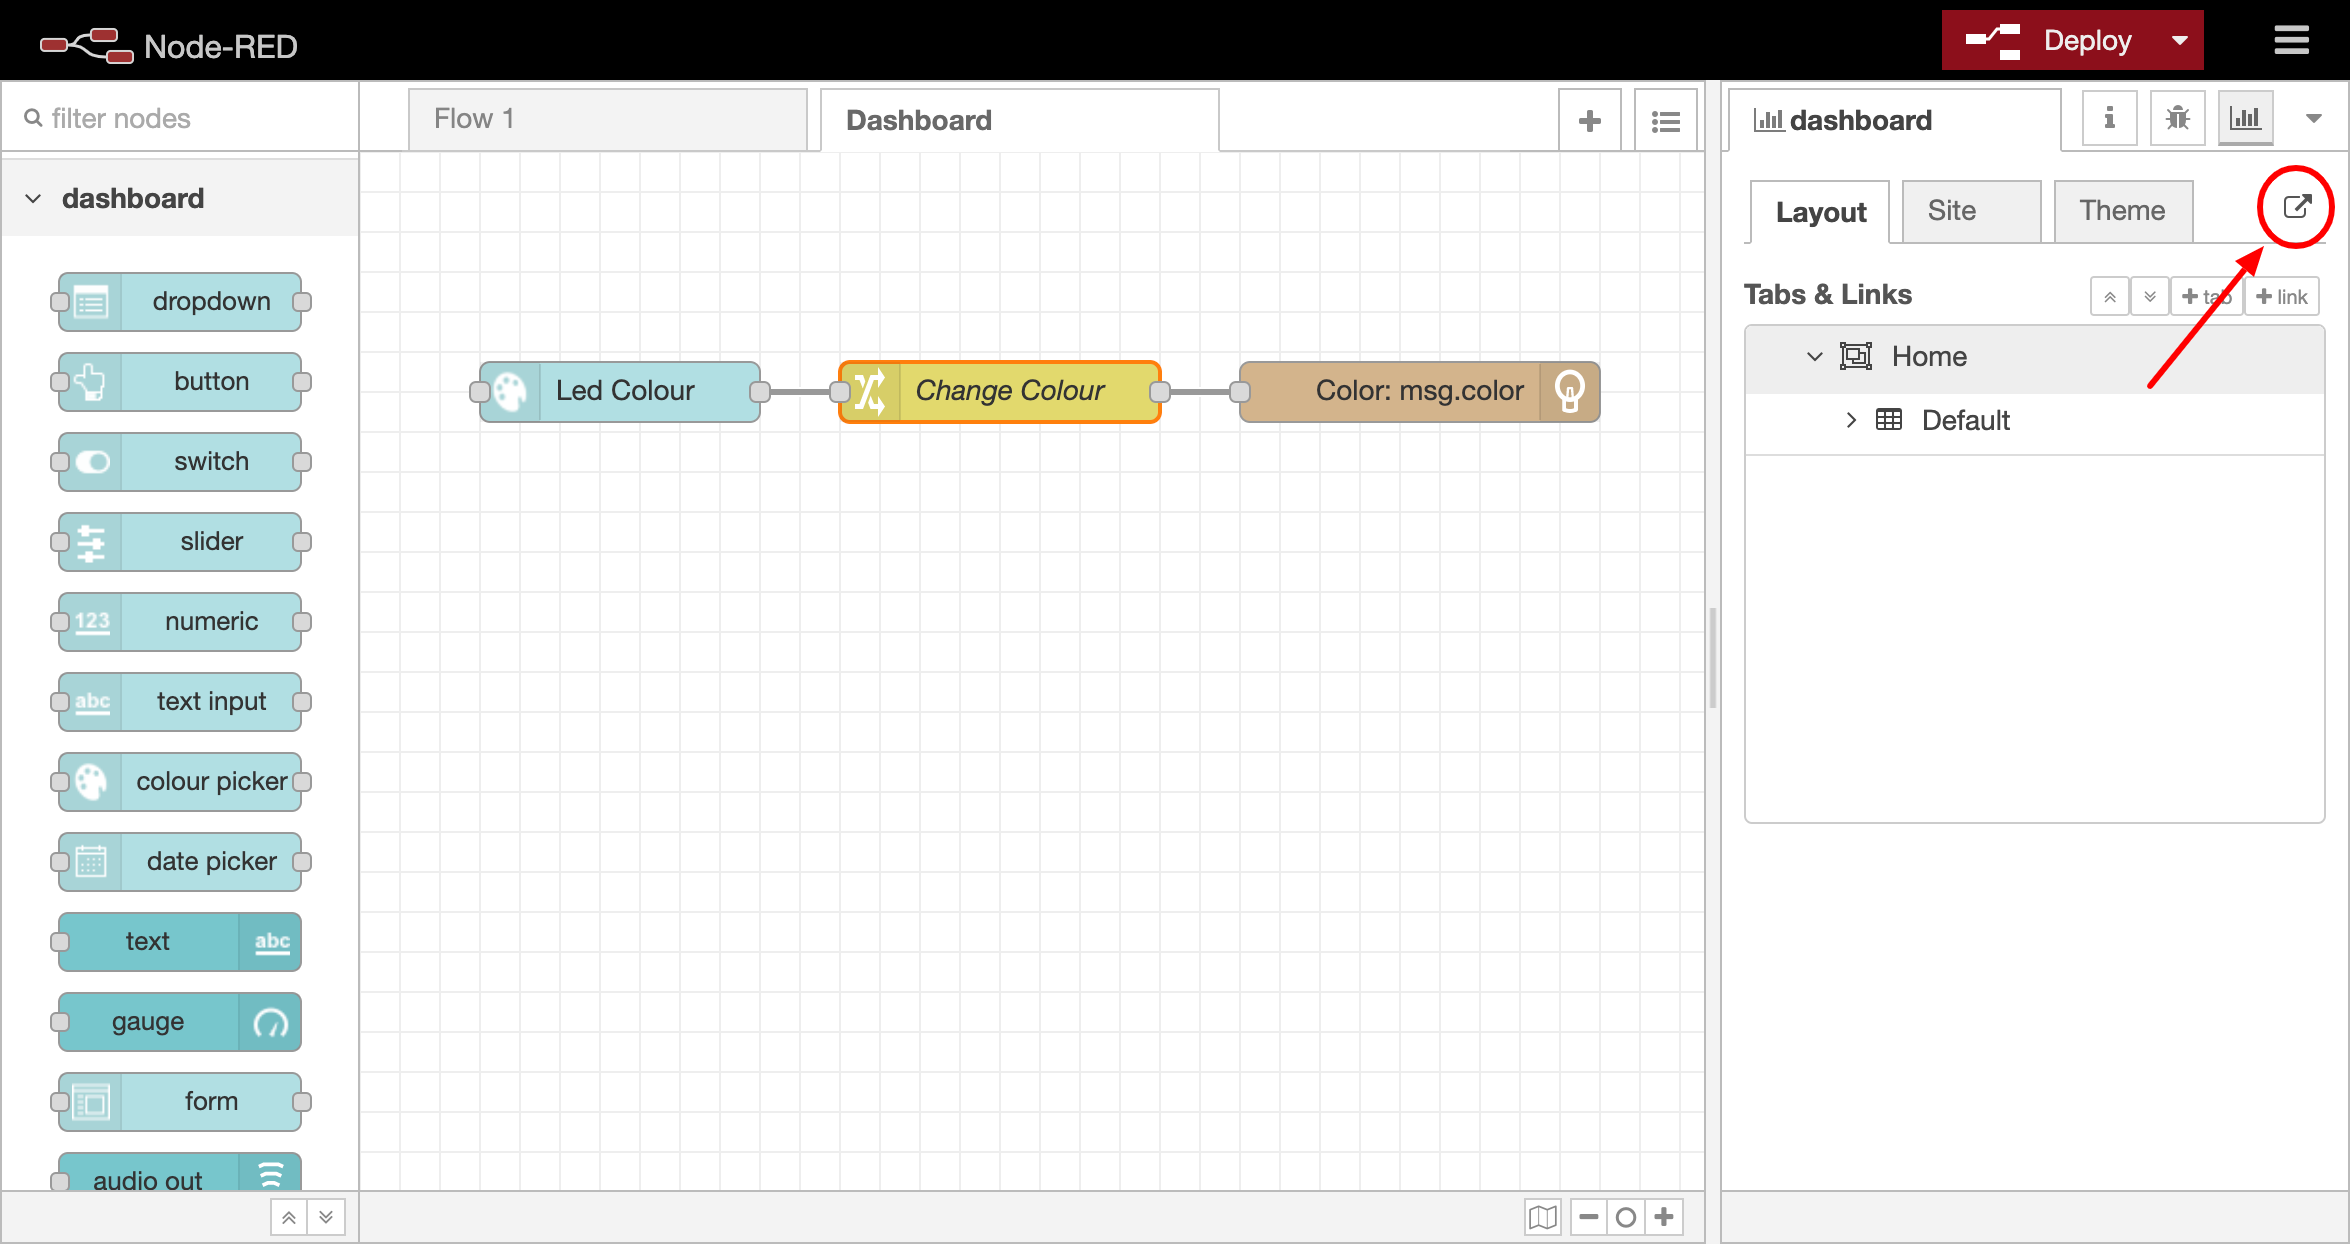
Now click on the external link icon.
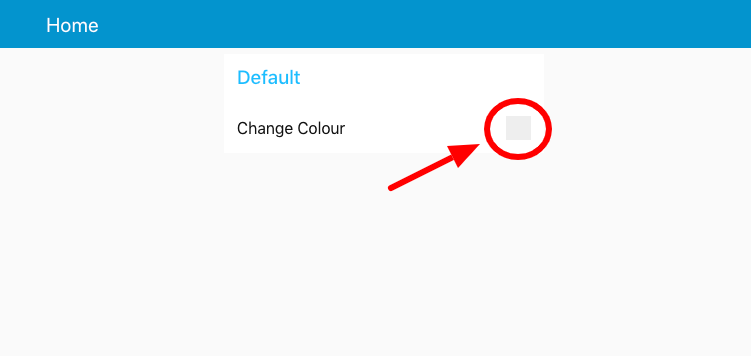
Now test your color picker by clicking on the gray square.
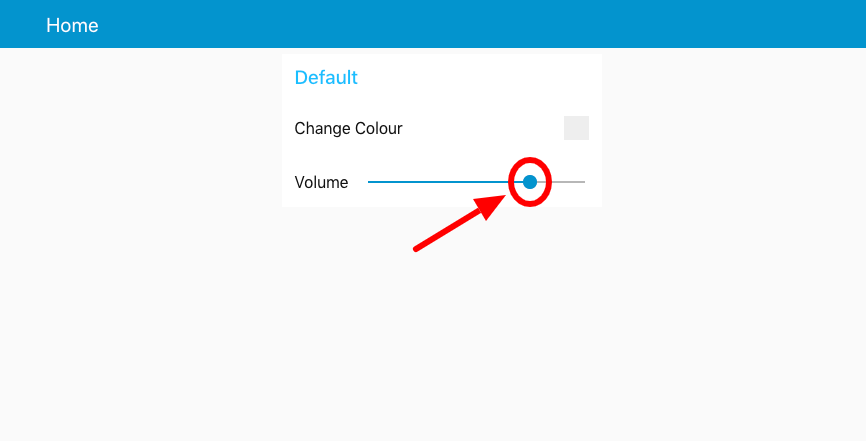
Building a Volume Slider
Because your AI-Bot will start to talk a little bit more, it is useful when you can easily adjust the volume of the sound. We are going to build a volume slider for this.
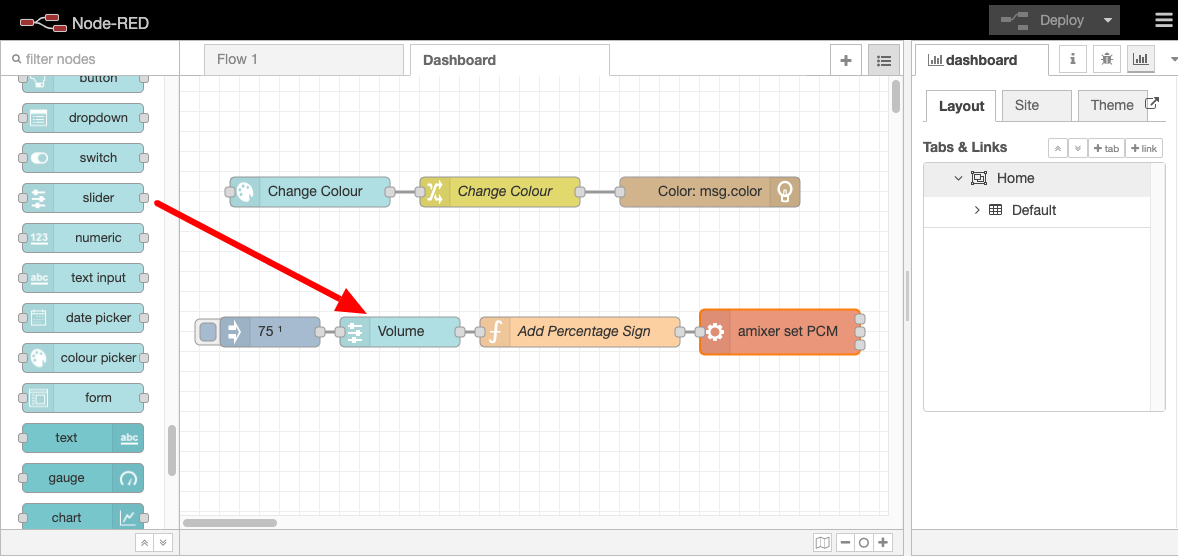
To do this, drag the following nodes to the "Dashboard" worksheet and connect them as shown in the image below.
- Inject (under the heading "common")
- Slider (under "dashboard")
- Function (under the heading "function")
- Exec (under the heading "function")
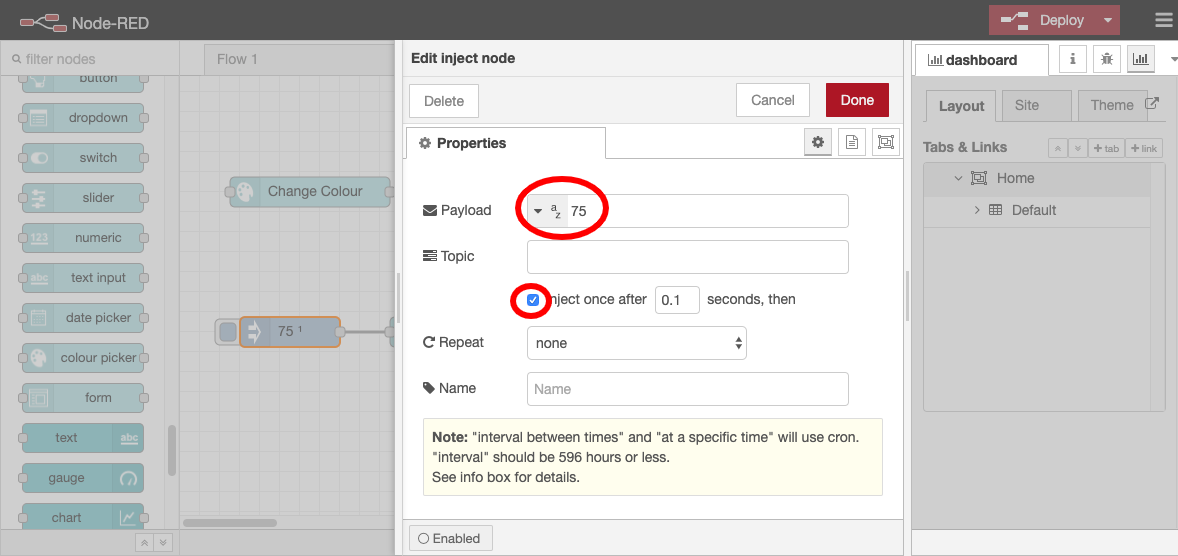
Now adjust the Inject node:
Payload: <String> with value 75
Select the option "Inject once after 0.1 seconds, then"
This means that this Inject Node now sends the value "75" in the message "msg.payload" every time after a Deploy, without you having to do anything yourself.
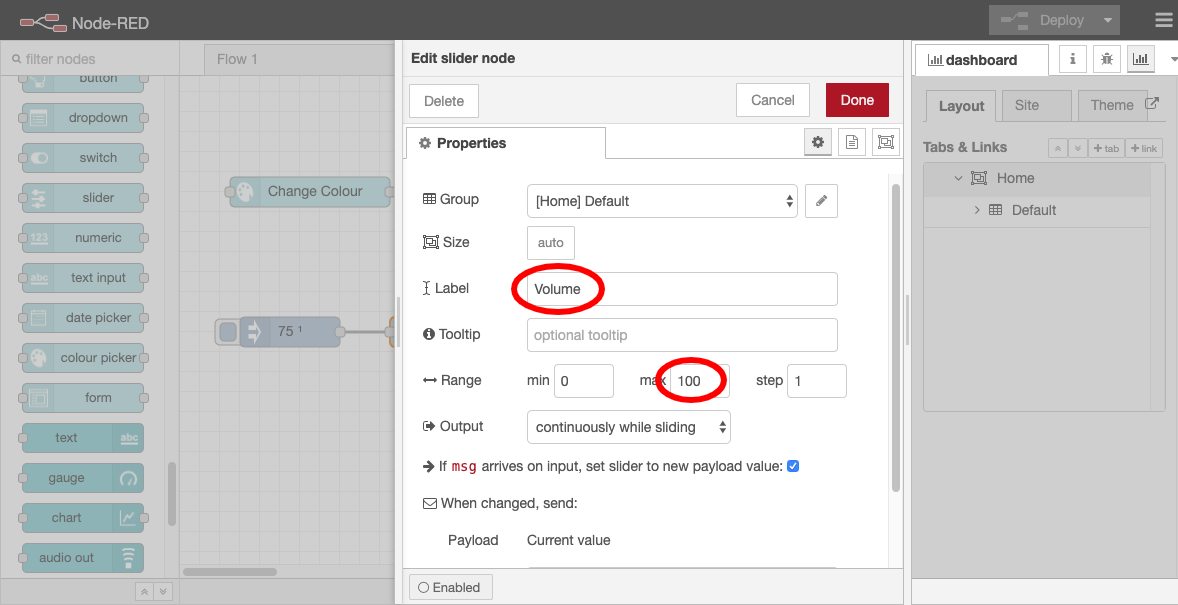
Adjust the slider node:
Label: "Volume"
Range Max value: change it from 10 to 100.
We have to adjust the maximum value to 100 because we want to work with percentages: the volume can be set somewhere between 0 and 100%.
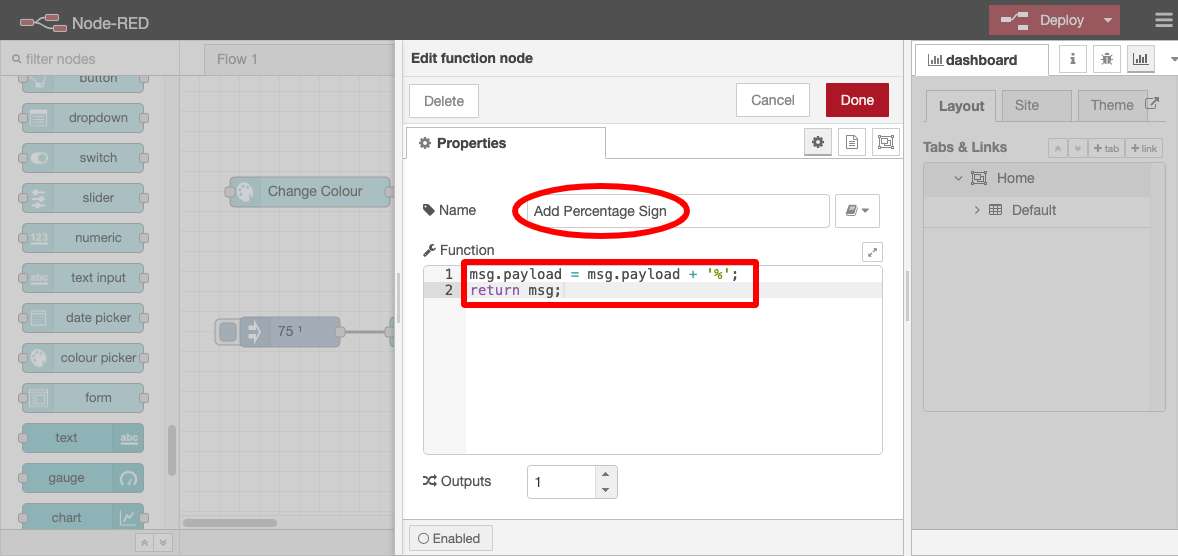
Customize the function node:
Name: "Add Percentage Sign"
Function: Add the following line at the top: "msg.payload = msg.payload + '%'"
Since the slider only forwards a number, we have to put a percent sign behind it ourselves. That is what that one line of code will do.
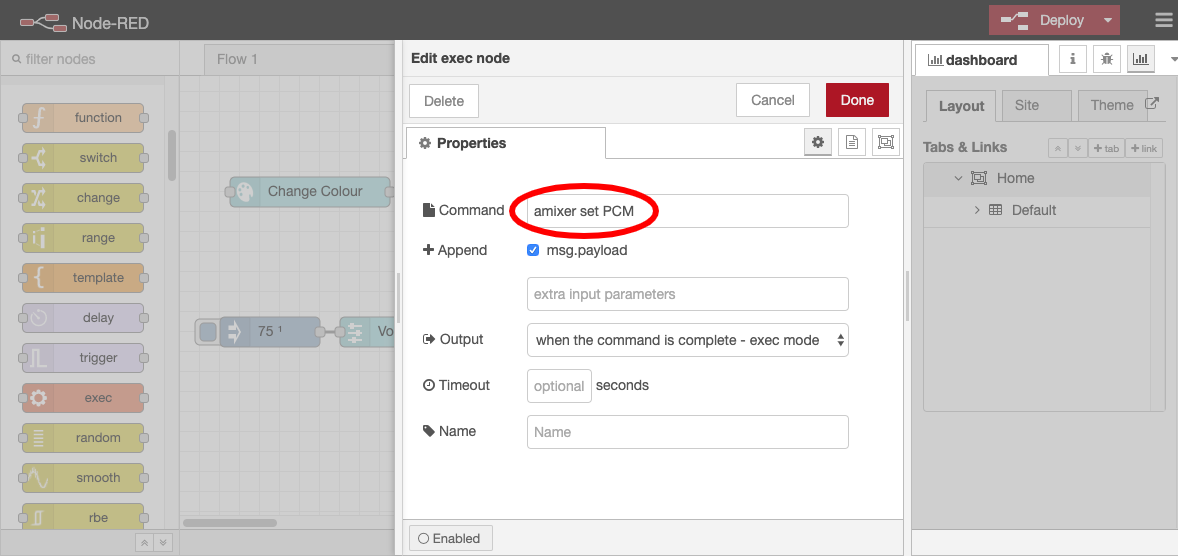
Customize the exec node:
Command: "amixer set PCM"
This is a command that can be sent to the Raspberry Pi to adjust the volume.
And since the Append option is checked for 'msg.payload', a new command with the provided percentage will be appended and sent to the Raspberry Pi every time you adjust the volume slider. For example if you move the slider halfway: "amixer set PCM 50%".
Now click on "Deploy" and test your new volume slider in your Node-RED dashboard to see if it works properly. Let your AI-Bot say something using the "speak" Flow you built in the Basics lesson.
Assignment
Now display the chosen color code and percentage of volume on the Node-RED dashboard.