 Nederlands
 English
Network
- Pull the microSD card out of the SD Card Adapter.
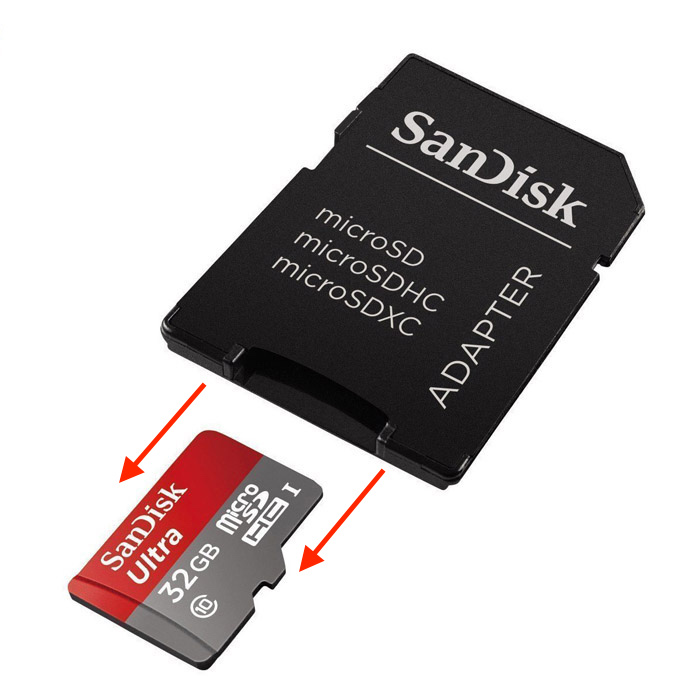
- Insert the microSD card in the microSD card reader.

- Insert the microSD card reader in your laptop or desktop computer. Pay attention!! If you are using a Windows computer you should see two drives appearing in the file manager of your operating system: boot and another drive with no name. The drive with no name is probably labelled as an USB drive as shown in the screenshot below.
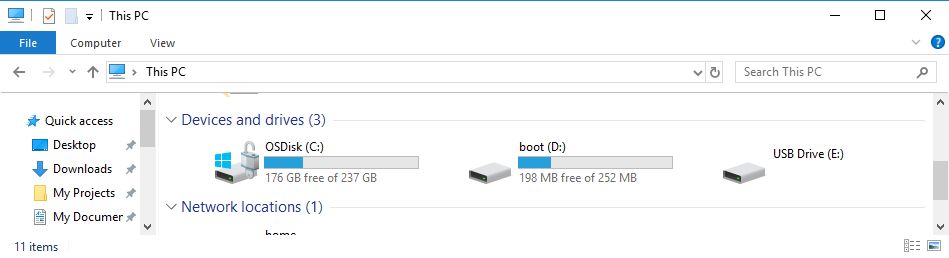
The boot file system is based on FAT (File Allocation Table). The other drive is based on a different kind of file system: ext4. Windows cannot handle ext4 by default, but can handle FAT filesystems. Do not try to open the drive based on ext4 in Windows.
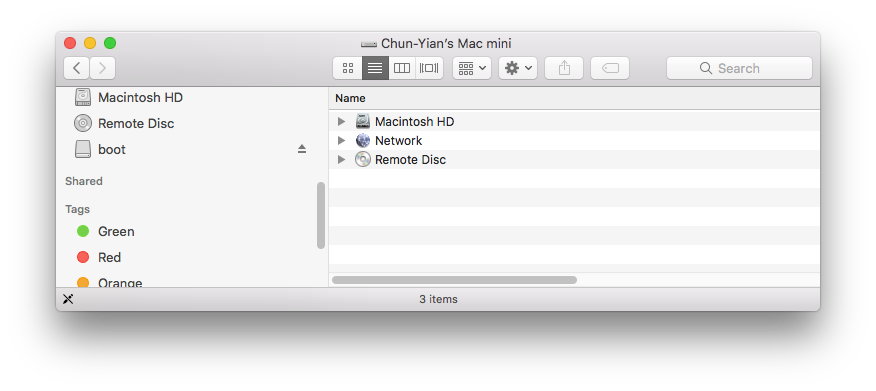
When you use an Apple computer you should see only the boot drive.
- Download the following file and save it on the boot drive (which is the microSD card) in the highest (root) directory: wpa_supplicant.conf
- Open the wpa_supplicant.conf file in a text editor and replace 'WiFi-Name' with the name of your WiFi network at home. And replace 'Wifi Password' with the Wifi Password of your network at home. Leave the quotes in both lines!
- Save the changes in wpa_supplicant.conf.
- Eject the microSD card reader. You can do this by right clicking on the boot drive and selecting the option "Eject". Now you can safely pull the microSD card reader out of your laptop or desktop computer.
- Now remove the Raspberry Pi 4 and the Raspberry Pi Power adapter from the packaging.
- Pull the microSD card out of the microSD card reader.
- Now insert the microSD card into the Raspberry Pi 4. The microSD card slot is located under the Raspberry Pi 4.
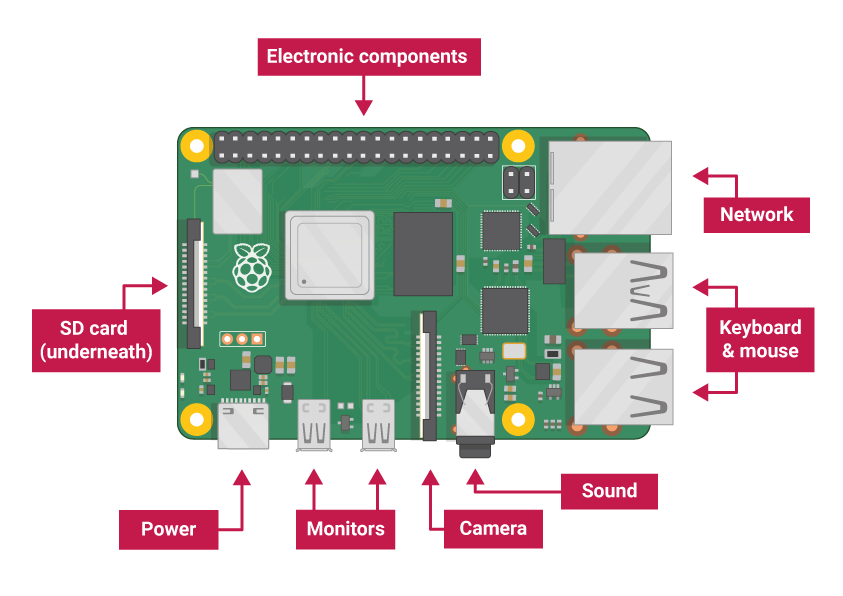
You must insert the microSD card with the gold-colored contacts facing the Raspberry Pi 4.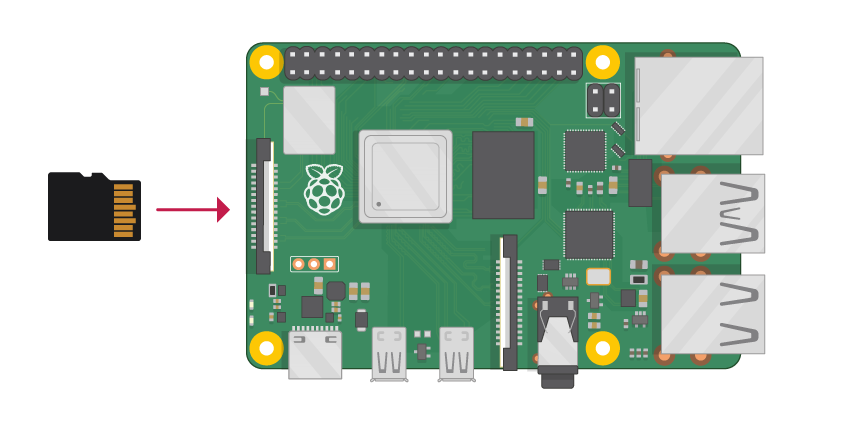
- Now plug the USB-C cable of the power adapter into the Raspberry Pi 4 and plug the power adapter into a power socket.
-
Now wait a minute for the Raspberry Pi 4 to start up and test whether you can connect to the Raspberry Pi 4 from your laptop or desktop computer.
Windows: Open the Putty program and run the following instructions: https://www.raspberrypi.org/documentation/remote-access/ssh/windows.md. Instead of the IP address, enter the name of the Raspberry Pi: "raspberrypi" and if that doesn't work, try "raspberrypi.local". The default login is "pi" and the password "raspberry".
Mac OS: Open the Terminal program and type the following into "ssh pi @ raspberrypi" and press <Enter>. If that doesn't work, try "ssh pi @ raspberrypi" + <Enter>. The default password for the user 'pi' is 'raspberry'. Because you are logging in for the first time you will see a security warning, type "yes" to continue.
- Once you have logged in on your RaspberryPi you have successfully tested the network connection and you can now turn off the Raspberry Pi by typing the following in Putty (Windows) or Terminal (Mac OS): "sudo shutdown now" + <Enter>. With this command you can neatly close the Raspberry Pi and you can unplug the power adapter after about 10 seconds.