 Nederlands
 English
Assemble the AI-Bot
In the YouTube video below you can see how you put your AI bot together. The movie starts automatically at 00:42.
Pay attention!:
- Don't forget to insert the microSD card into the Raspberry Pi.
- They use a different type of speaker and microphone in the video.
- Make sure that the 3D printed part that supports the jaw of your AI-Bot is pointing with the short side up.
- Insert the Pi camera in your AI-Bot in such a way that the flat ribbon cable sticks out at the top.
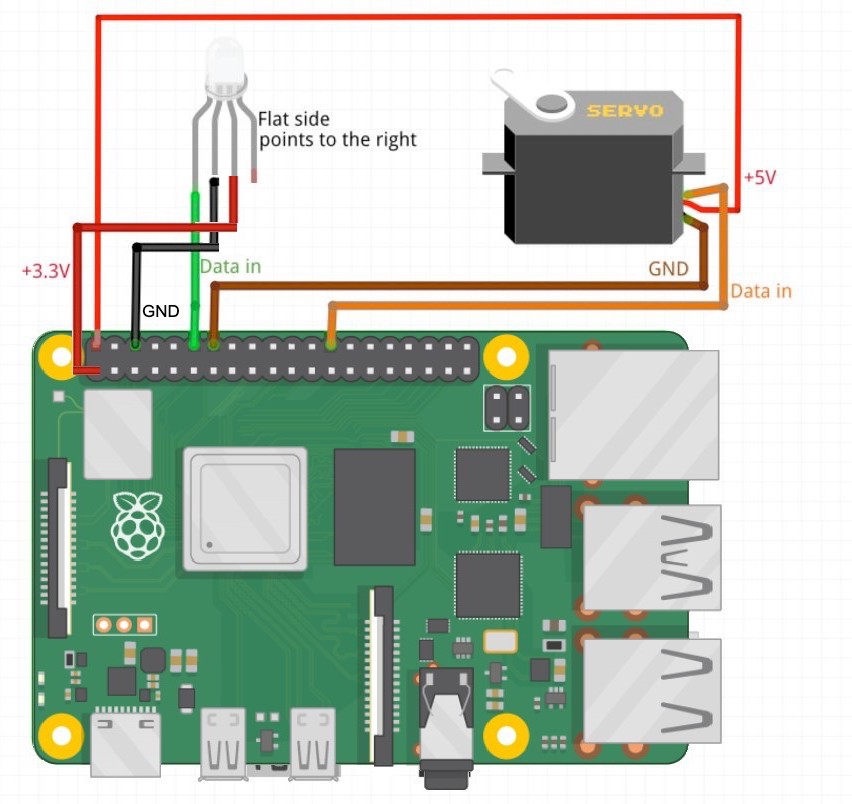
For the cabling you must follow the diagram below. Do not connect the LED until you have inserted the LED through the slit for the LED. Make sure that the pins of the LED cannot touch each other by spreading them a little.
Attention !!: if you connect the LED incorrectly, your LED or your Raspberry Pi can be damaged !!

To connect the Pi camera, you must first pull up the clip of the camera connector. The red arrows in the following image show which clip you need to pull up a bit.
![]()
![]()
Then push the flat camera cable into the connector with the blue side pointing to the side of the headphone jack as shown in the image below. When the cable is in, push the clip back into the connector.

![]()
Do not immediately plug your AI-Bot into the socket when you are ready, but inform us first.